training-labs
Lab 3 V2: Sending Data over LoRaWAN
This revised version of Lab 3: Sending Data over LoRaWAN has been restructured to enhance clarity and improve the learning experience. It follows a logical, step-by-step approach that introduces fundamental concepts before moving into hands-on implementation. The lab begins with clearly defined objectives and key tasks, helping students understand the purpose and relevance of each stage—from preparing and transmitting data to decoding it in the cloud.
Background
Before beginning the lab instructions, it is assumed that the prelab tasks have been completed, including creating a The Things Network (TTN) account, setting up an application on TTN, and properly configuring the end device and keys in key.h.
Section 1: Defining Structure and Assigning Values in Arudino
This section focuses on correctly defining a structure, instantiating objects, and assigning values of different data types before transmitting data over LoRaWAN.
Task 1: Download the starter code
Clone or download the following repo. If you download the starter
code as a .zip file from GitHub, make sure to rename the unzipped folder
to ttn-otaa-highlevel.
https://github.coecis.cornell.edu/LPWAN-Training/ttn-otaa-highlevel
Task 2: Create Structure
Open the starter Arudino file ttn-otaa-highlevel.ino. Please create a structure called pkt_fmt outside all functions to format your packet. See Prelab 3a for an introduction to structures in C++.
//Put this code outside of all functions, in the *global scope*
// Define a structure 'pkt_fmt' with a packed attribute to ensure there is no padding between its members.
 // This is important when dealing with binary data formats or hardware communication, where exact size and layout matter.

  struct __attribute__((__packed__)) pkt_fmt {
      uint8_t intNum; // A 8-bit unsigned integer

      uint8_t myString[6];   // A fixed-size array of 6 bytes to store a short string or byte sequence.

      float floatNum;    // A 32-bit floating-point value
  };
Task 3: Instantiate the Structure Object
Declare a global instance of the structure.(Outside all functions)
 // Declare a global variable 'myPkt' of type 'pkt_fmt'.
 // This variable can be accessed and modified by any function in the program.
 pkt_fmt myPkt;
Task 4: Assign Test Values to the Object
After creating the object myPkt, you are able to assign customized values to the structure accordingly.
- Integers:
myPkt.intNum = - Float:
myPkt.floatNum =
Assigning a String can be tricky. Inside the setup function, define a C-string as an array of chars or uint8_ts. Then, use memcpy to copy into the corresponding data member of your structure.
uint8_t myCString[6] = "Hello";
memcpy(myPkt.myString, myCString, 6);
Task 5: Correct SendBuffer Function
You can find SendBuffer function in both the setup function and loop function.
In LoRaWAN, sendBuffer is typically used as a temporary storage array for the payload data that will be transmitted from the end device to the LoRaWAN network server.
You now want to send bytes starting at (uint8_t *) &myPkt by replacing messageBuffer.
There are now sizeof(myPkt) bytes to send instead of bufferLength
bytes to send.
myLoRaWAN.SendBuffer(messageBuffer, bufferLength, myStatusCallback, NULL, false, 1);
Section 2: Decoder Implementation on The Things Network (TTN)
After creating the proper data structure in Arduino, a decoder in the Uplink is required to correctly interpret the structured data received from the end device.
Task 1: The Decoder Function
Since the payload has three datatypes (Integer, Float, String based on our structure in Arudino), the decoder needs corresponding functions to translate bytes to certain datatypes.
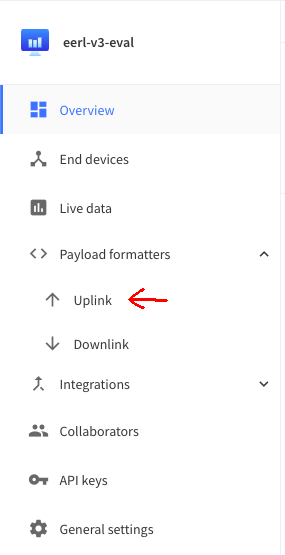
Navigate to the “Payload formatters” tab on the side-panel of your application on the TTN Console, and select “Uplink”. Decoders are commonly created in JavaScript, so select that from the dropdown to create a new decode script.
Task 2: Interpret Integers
For integers, you can start decoding both signed and unsigned ints in a similar way. However, for bytes that represent a signed integer, you must assign a negative weight to the most significant bit.
To better understand how the translation works, you can refer the bit shift operation in Prelab 3a.
Please copy and place the code in the decoder function.
 // Function to build an unsigned integer from an array of bytes
 // This function treats the bytes as an unsigned integer in little-endian format

  function build_uint_from_bytes(bytes) {
    var built_up_uint = 0; // Initialize the result as 0
    for (var i = 0; i < bytes.length; i++) {
      // Add the value of each byte shifted to its        appropriate position
      // '<<' shifts the byte value by (i * 8) bits to its place in the integer
      built_up_uint = built_up_uint + (bytes[i] << i * 8);
    }
   return built_up_uint; // Return the constructed unsigned integer
 }

 // Function to build a signed integer from an array of bytes
 // This function interprets the bytes as a signed integer in little-endian format

 function build_int_from_bytes(bytes) {
   var built_up_int = 0; // Initialize the result as 0
   var cap = bytes.length - 1; // Determine the index of the most significant byte

   // Process all bytes except the most significant byte
   for (var i = 0; i < cap; i++) {
     // Add the value of each byte shifted to its appropriate position
     built_up_int = built_up_int + (bytes[i] << i * 8);
   }

   // Handle the most significant byte separately to account for its signedness
   var lastByte = bytes[cap]; // Get the most significant byte

   if (lastByte & 0b10000000) {
     // Check if the most significant bit (MSB) is set, indicating a negative value
     lastByte = lastByte - 256;
     // Convert the byte to a signed value (e.g., 0xFF becomes -1)
     built_up_int = built_up_int + (lastByte << cap * 8);
     // Add the signed value to the total, shifted to its proper position
   }

   return built_up_int; // Return the constructed signed integer
 }
Task 3: Interpret Floats
Floats take the most significant bit (bit 31, or bit 7 of byte 3) as its sign bit. There are then 8 bits that are a biased exponent, and the remaining 23 bits are the fractional part.
Please copy and place the code in the decoder function. See Prelab 3b for an introduction to floating point numbers.
function floatFromBytes(bytes) {
    // JavaScript bitwise operators yield a 32 bit integer, not a float.
    // Assume LSB (least significant byte first).
    var bits = bytes[3]<<24 | bytes[2]<<16 | bytes[1]<<8 | bytes[0];
    // >>> is unsigned right shift. Zeros are shifted in at all times from the left
    var sign = (bits>>>31 === 0) ? 1.0 : -1.0;
    var e = bits>>>23 & 0xff;
    // Can code explicit leading 0 with 0 exponent. Otherwise, there is a
    // leading 1 implied.
    // Since we have constructed our significand/mantissa like we constructed
    // our integers, it is a factor of 2^23 too large (decimal point all the way)
    // right.
    // So, we correct that when we build the final number.
    var m = (e === 0) ? (bits & 0x7fffff)<<1 : (bits & 0x7fffff) | 0x800000;
    var f = sign * m * Math.pow(2, e - 127-23);
    return f;
  }
Task 4: Interpret String
You can use the static method String.fromCharCode with Javascript’s
spread operator ... as in the following function:
function stringFromBytes(bytes){
  return String.fromCharCode(...bytes);
}
Please copy and place the function in the decoder function. See Prelab 3b for an introduction to Strings.
Task 5: Decode the Payload
Create and define the decodeUplink(input) function at the bottom of the scrip to correctly reflect the packet structure. By using input.bytes.slice function, we are able to seperate the integer, string, and float in correct length from the payload.
Please fill out the correct indices inside each datatype interpretation function. Following the comment as hints.
Once you enter all the correct indices, click Save at the bottom of the page.
function decodeUplink(input) {
  var myPkt = {};

  // Extract the floating-point number from the appropriate byte range
  myPkt.floatNum = floatFromBytes(input.bytes.slice(/* Place the correct indices based on packet structure */));

  // Extract the integer number from the first byte
  myPkt.intNum = input.bytes[/* Place the correct index based on packet structure */];

  // Extract the string from the appropriate byte range
  myPkt.myString = stringFromBytes(input.bytes.slice(/* Place the correct indices based on packet structure */));

  return {
    data: myPkt,
    warnings: [],
    errors: []
  };
}
Section 3: Live Data Testing
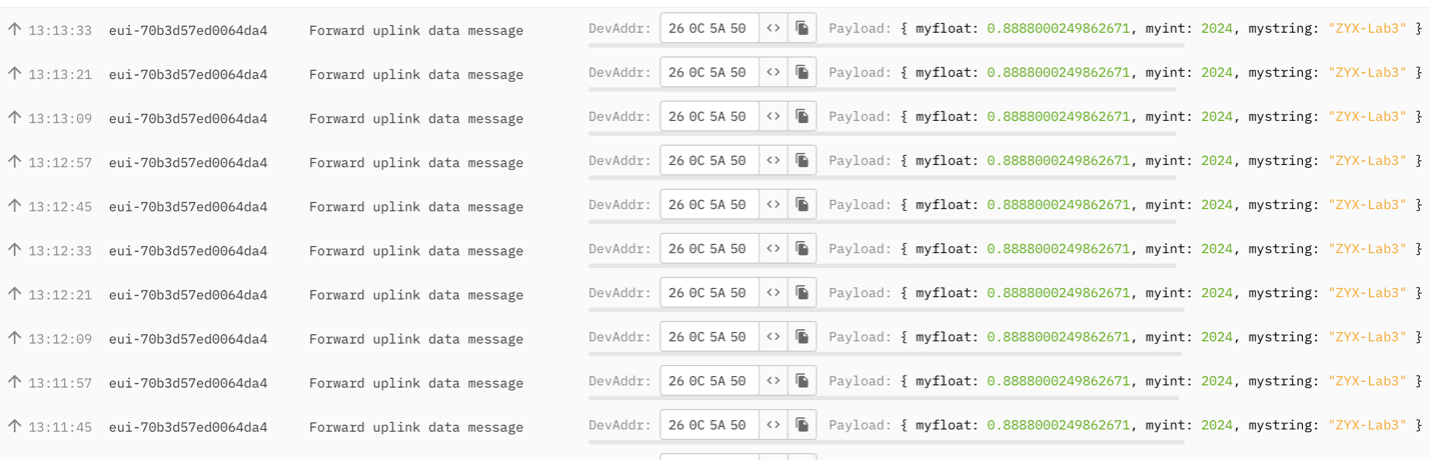
Please upload the sketch from Arudino to the board. You now may see your customized data showing in “Live Data” tab. Your decoder should match the packet format on Arduino so that the “Live Data” on TTN show the correct decoded payload.
Submission
Submit a one-page report describing the challenges you faced during the lab At the end of this report, please include the following as appendices in the same document. Either text form or screenshot form is fine unless specified.
-
Your Arduino program (
ttn-otaa-highlevel.inoand any new code files. Do not submit yourkeys.h.) -
Your decoder function on the TTN Console
-
A screenshot of the “Live data” area of the TTN console showing a few successful transmissions.