Presenting the PiArcade4KB!
Hardware

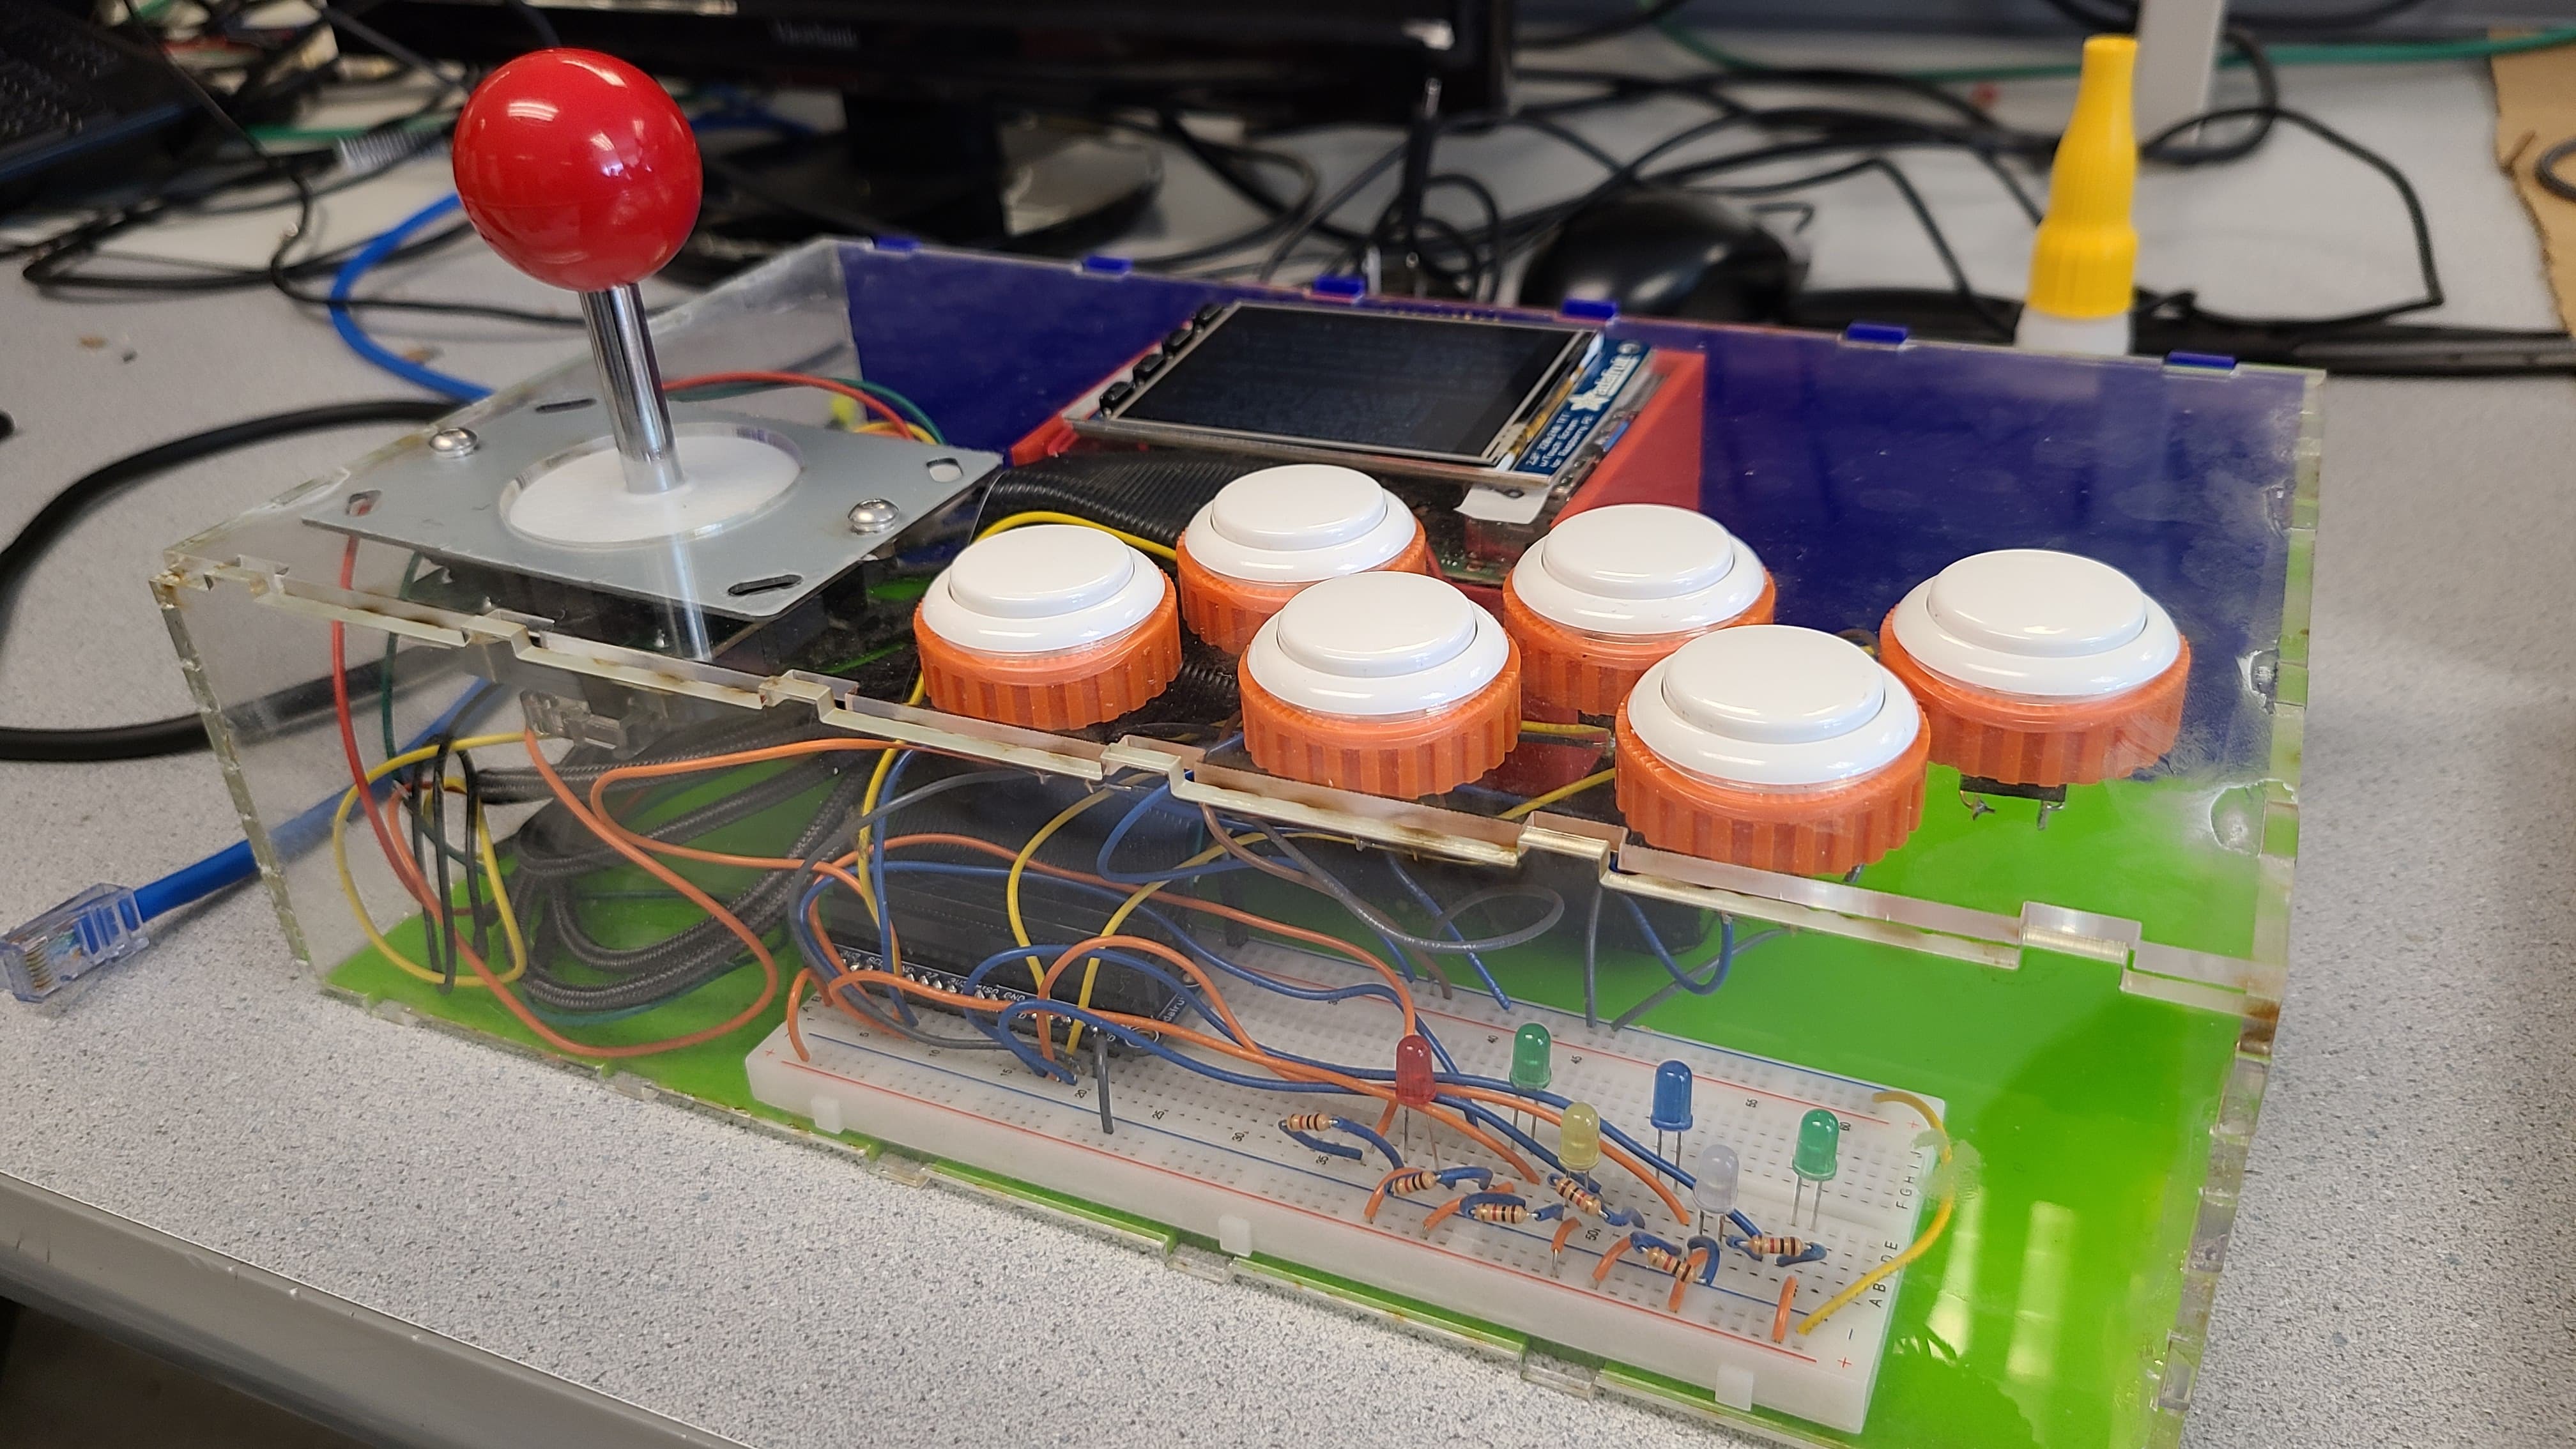
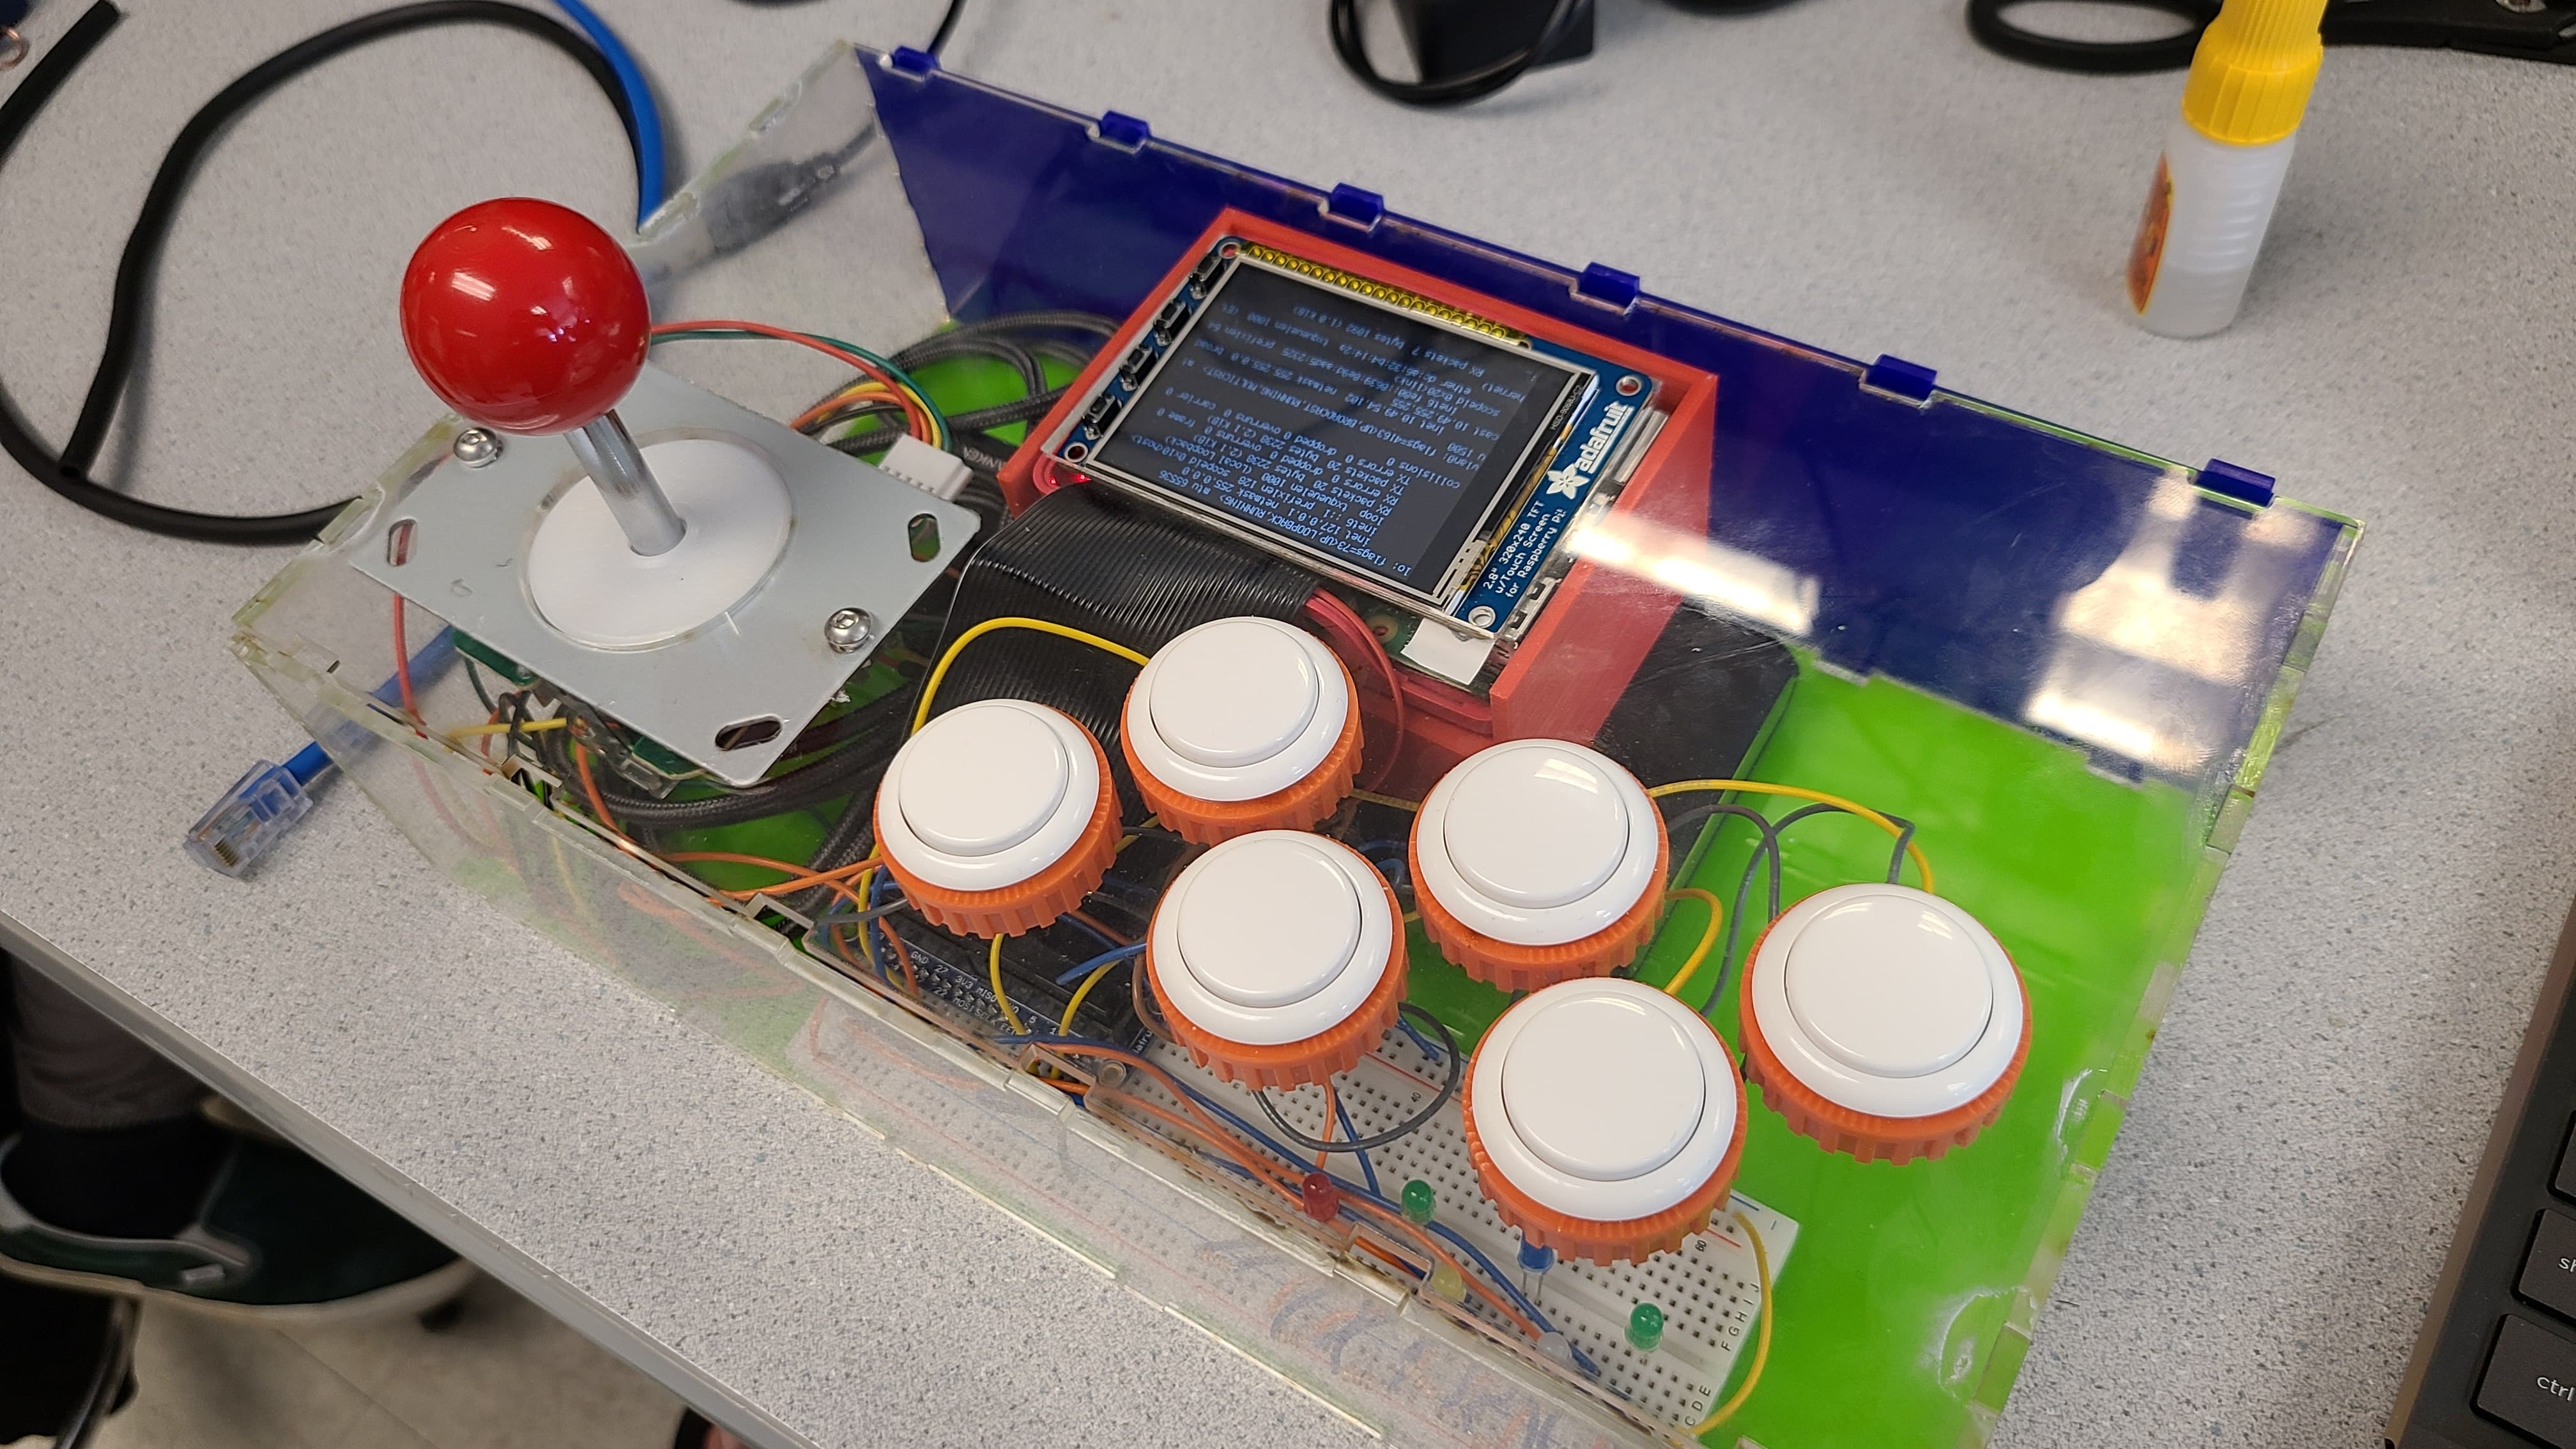
The Build
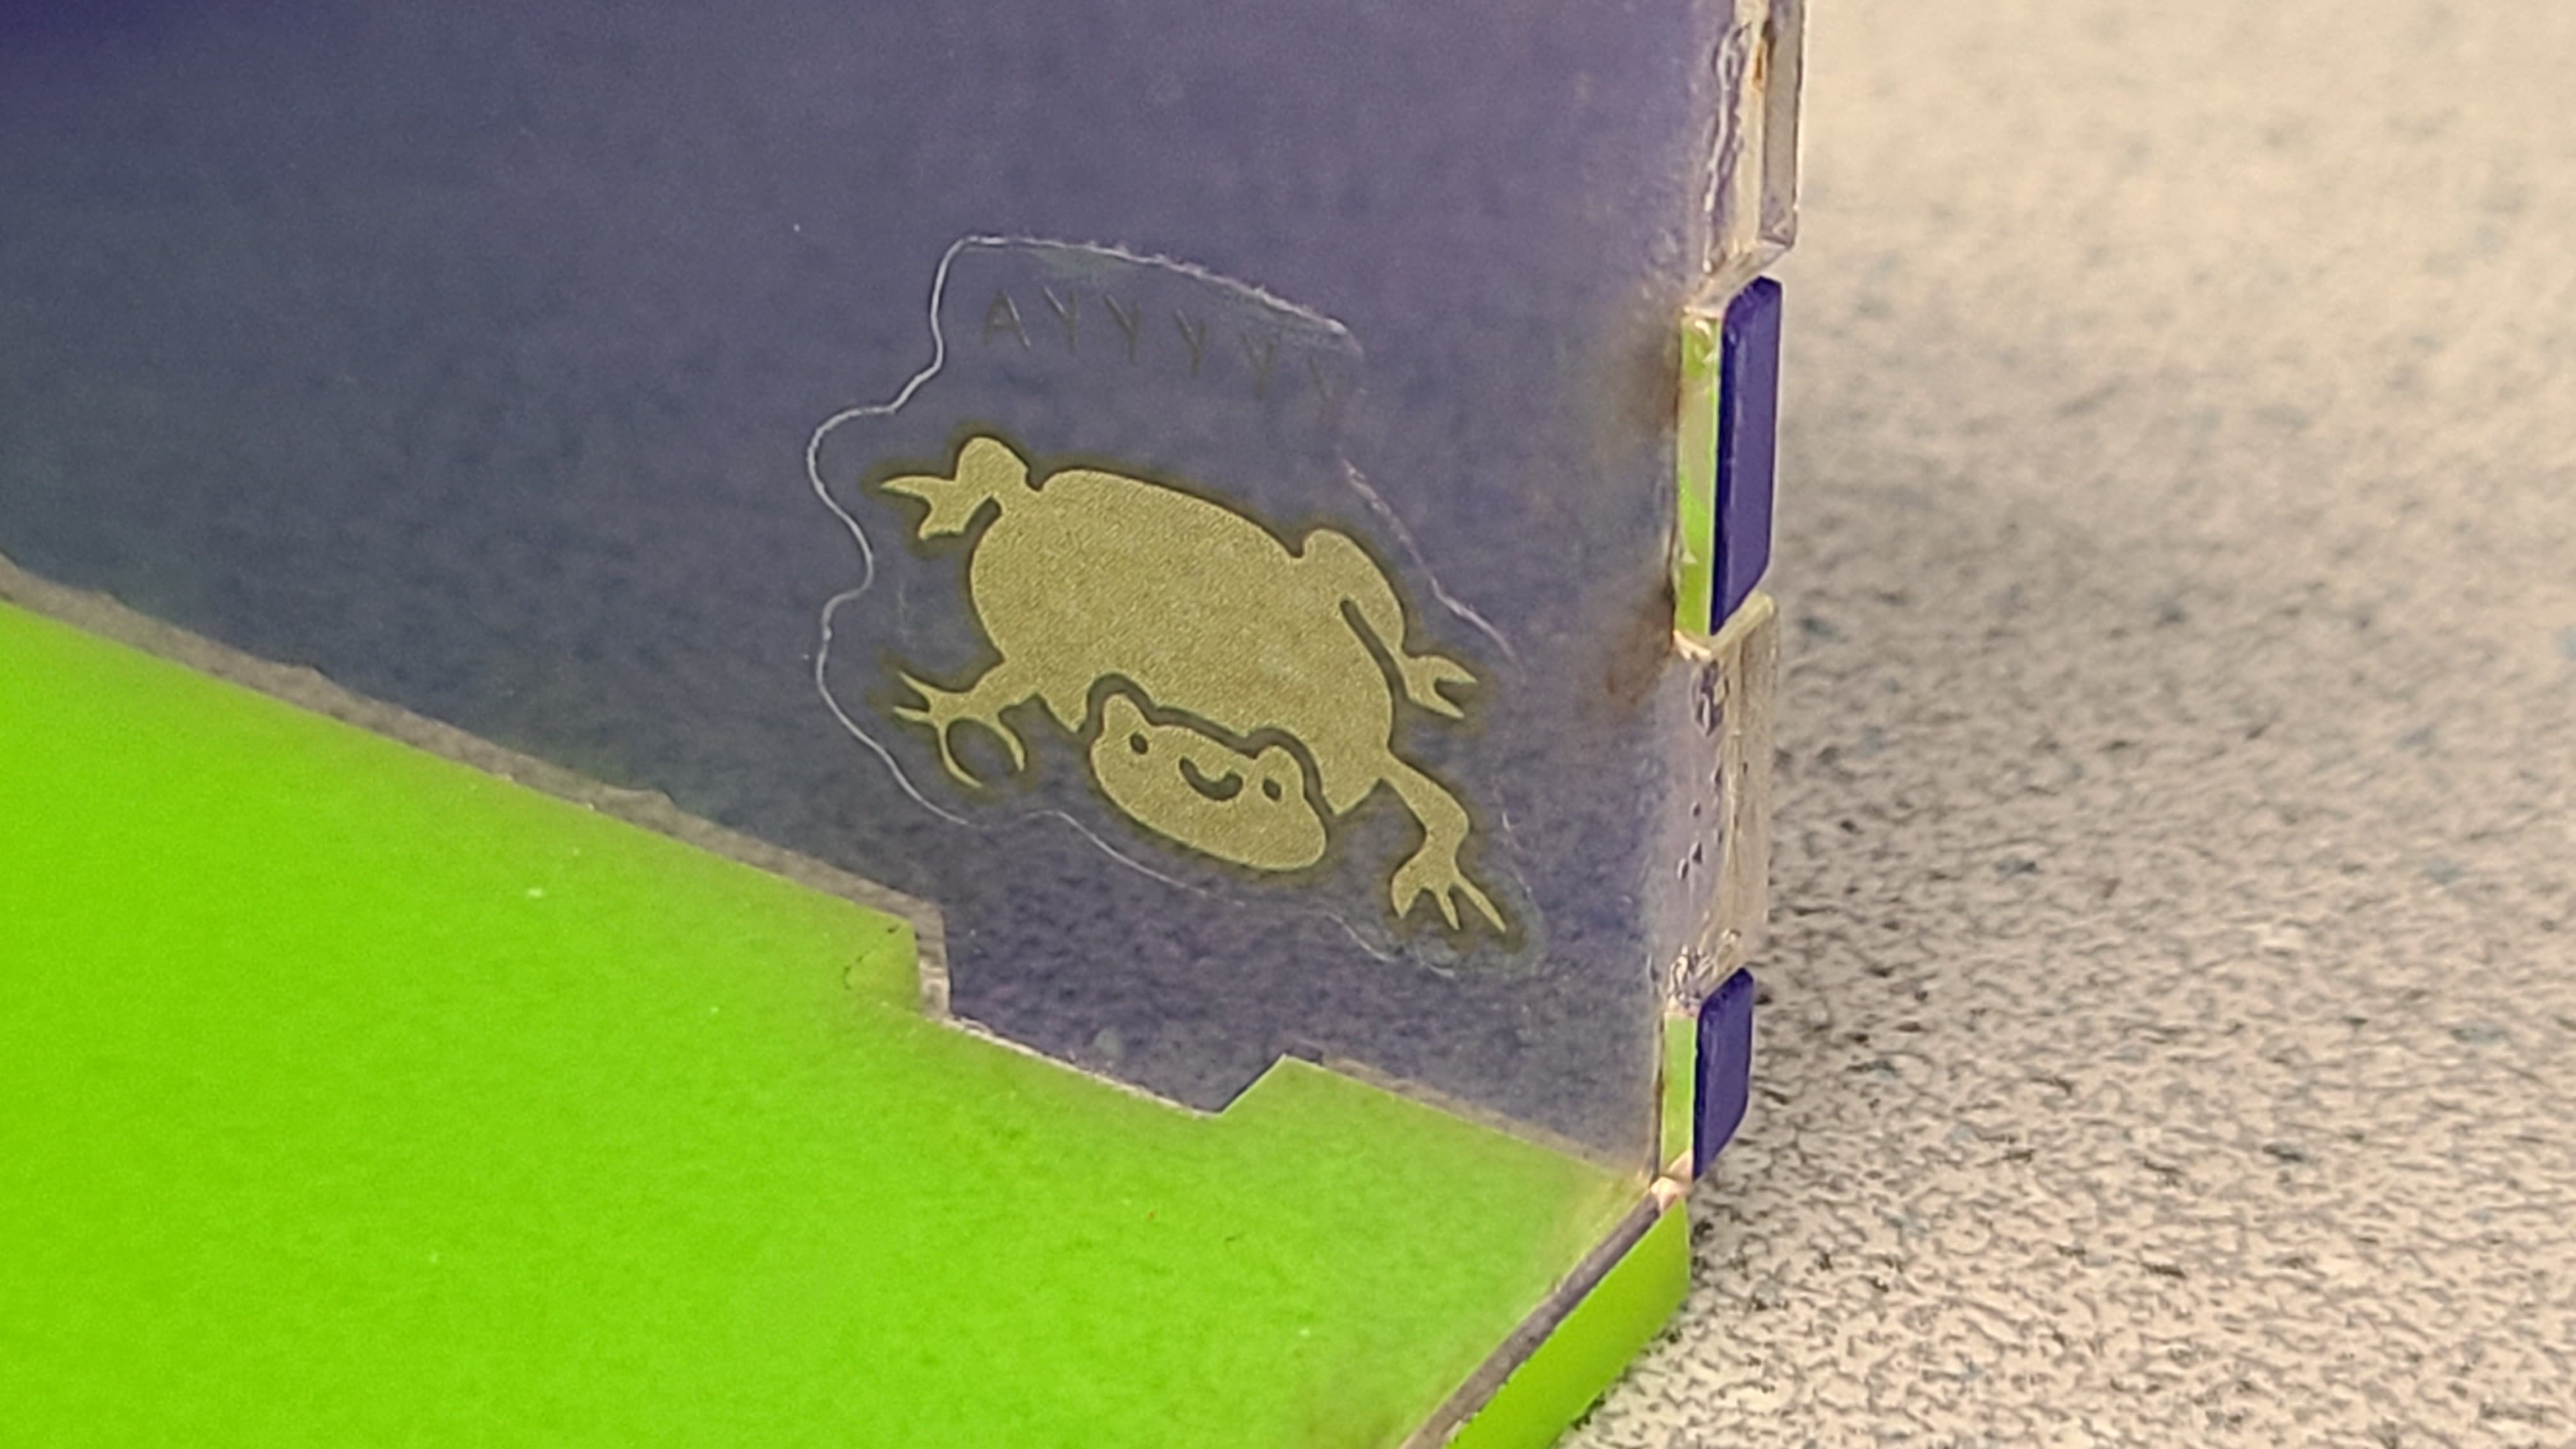
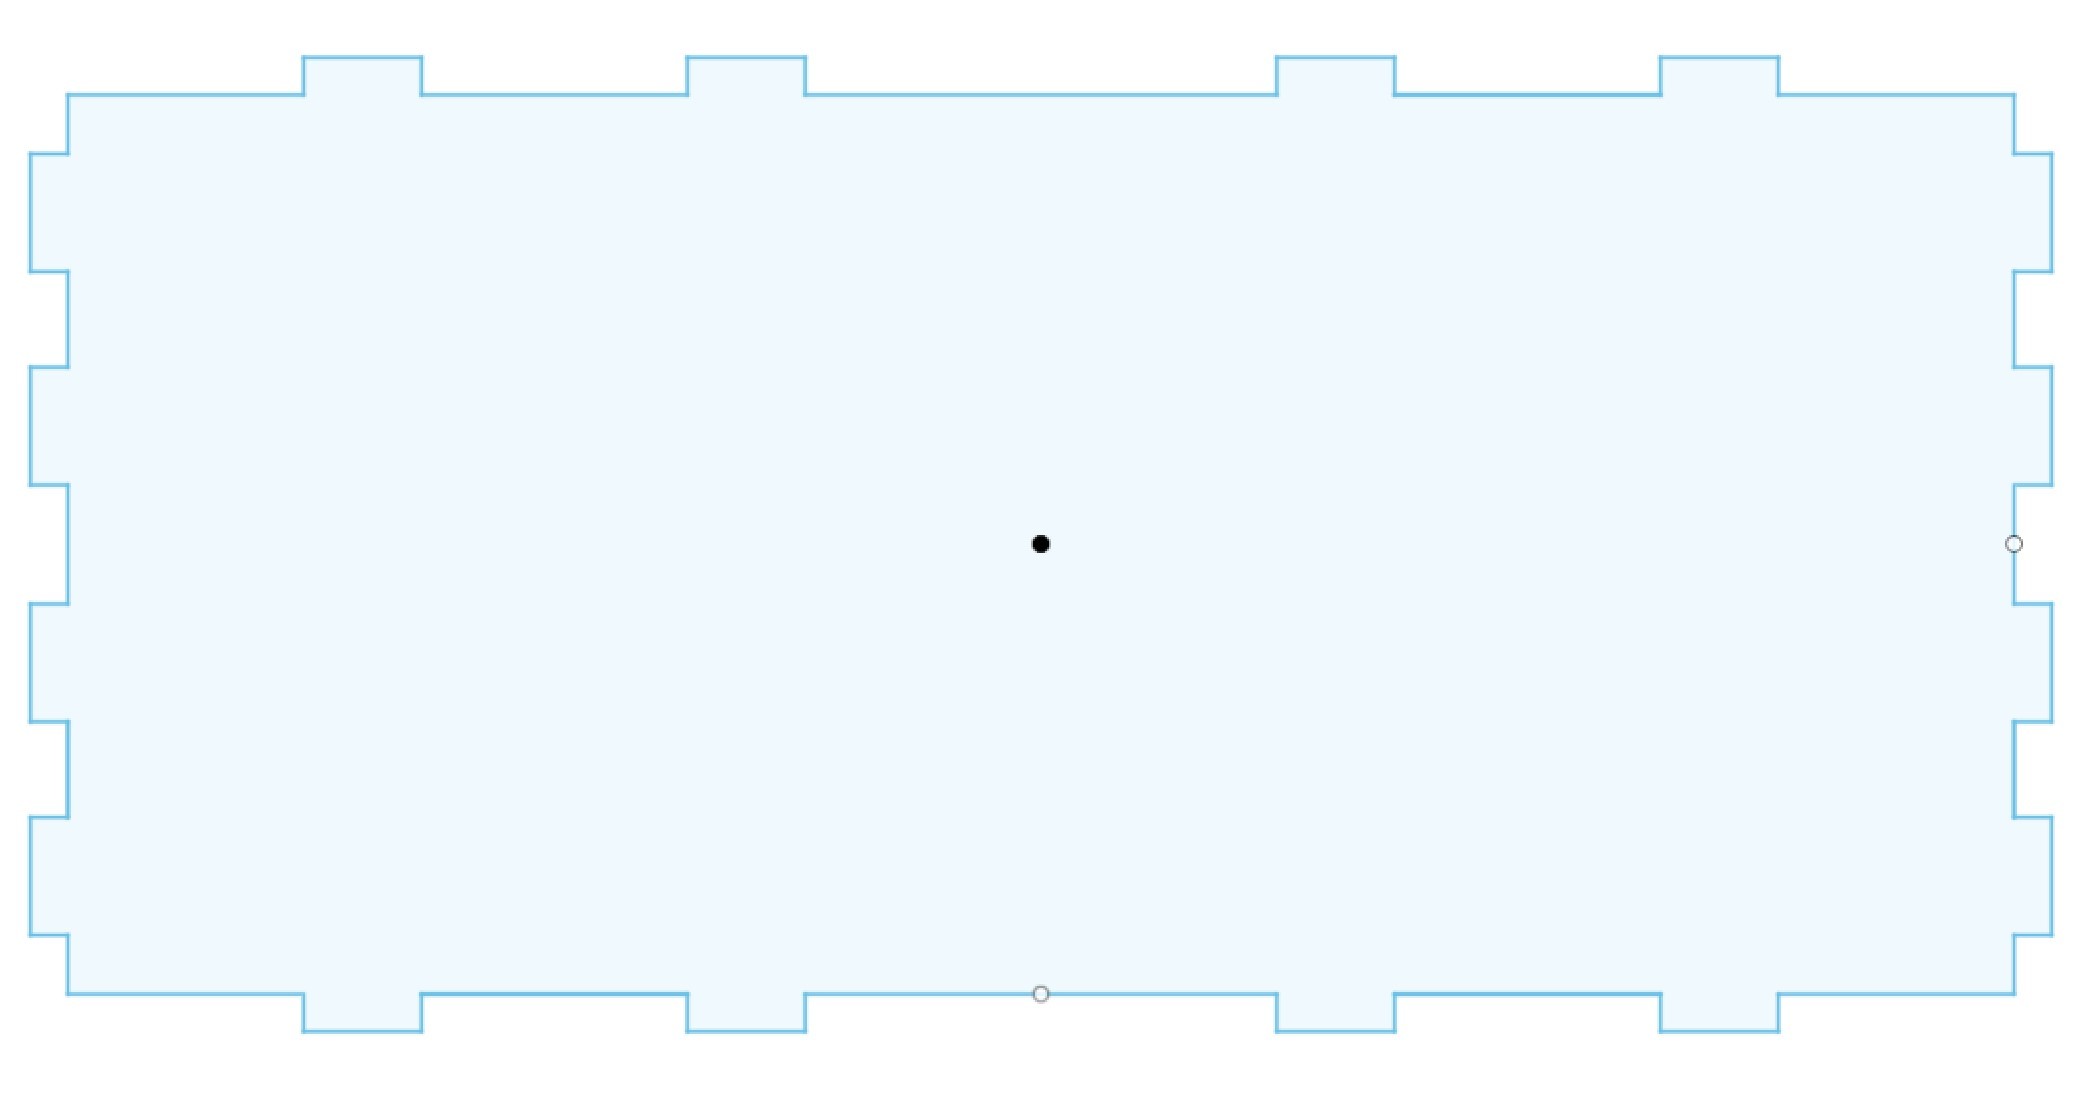
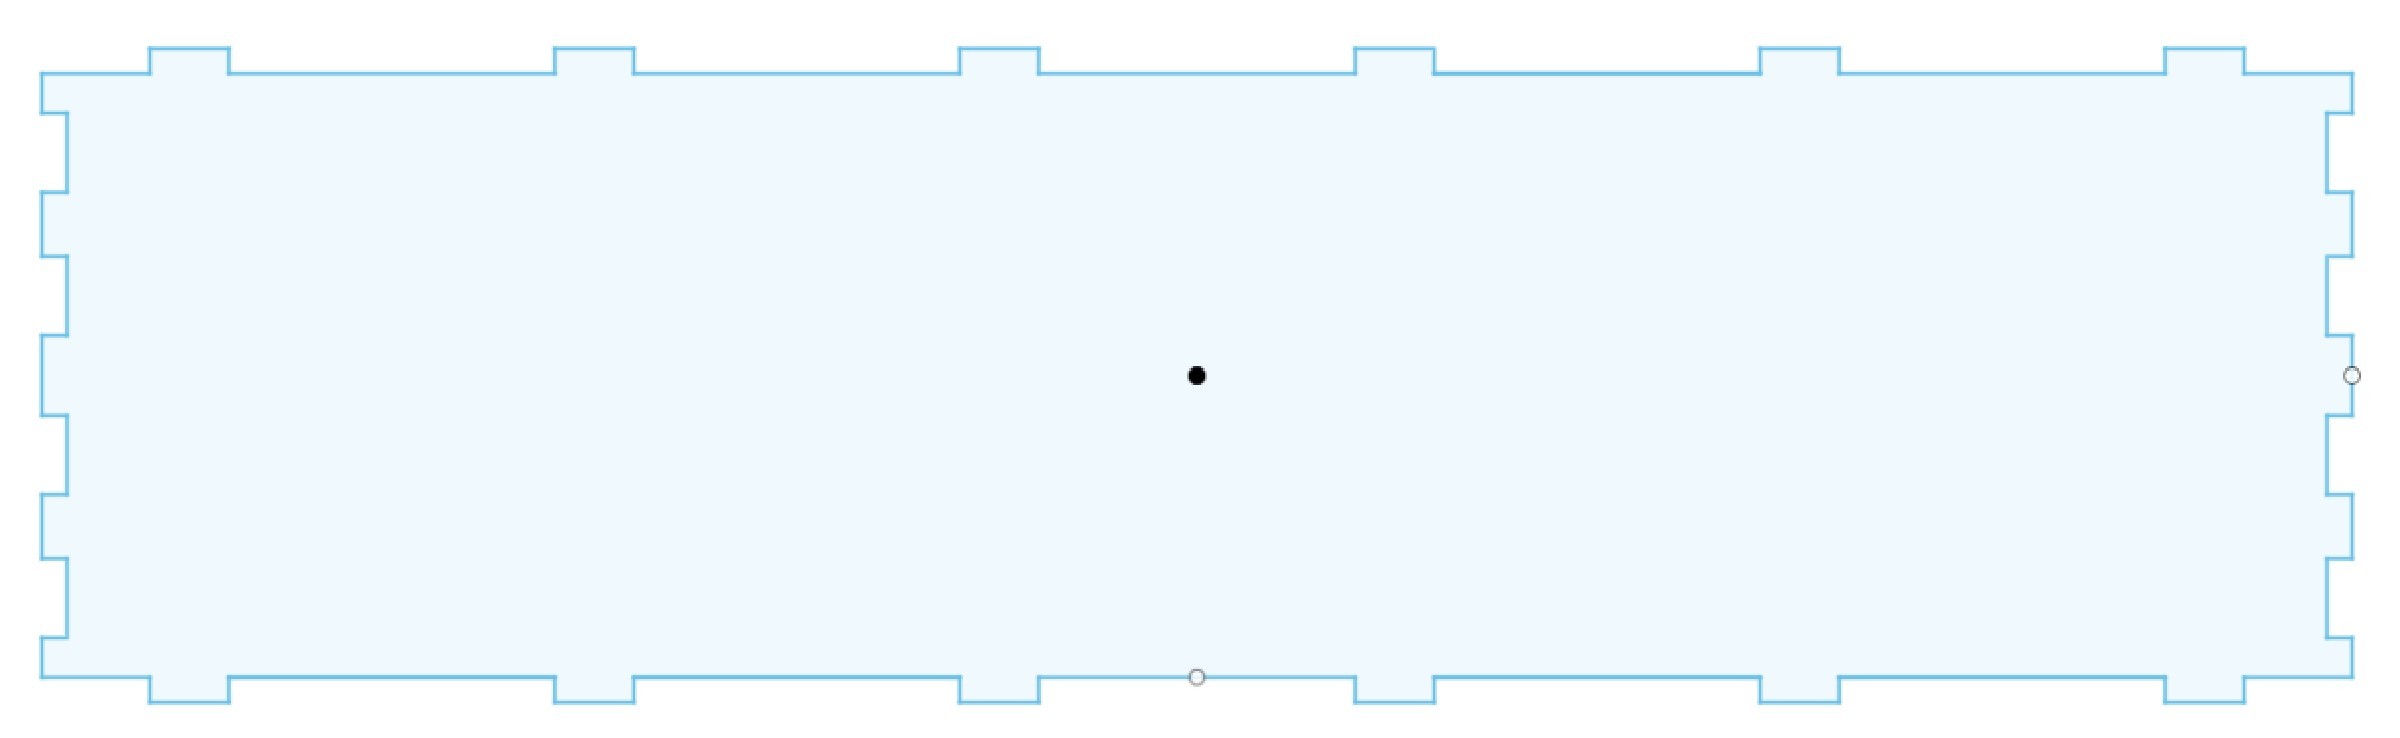
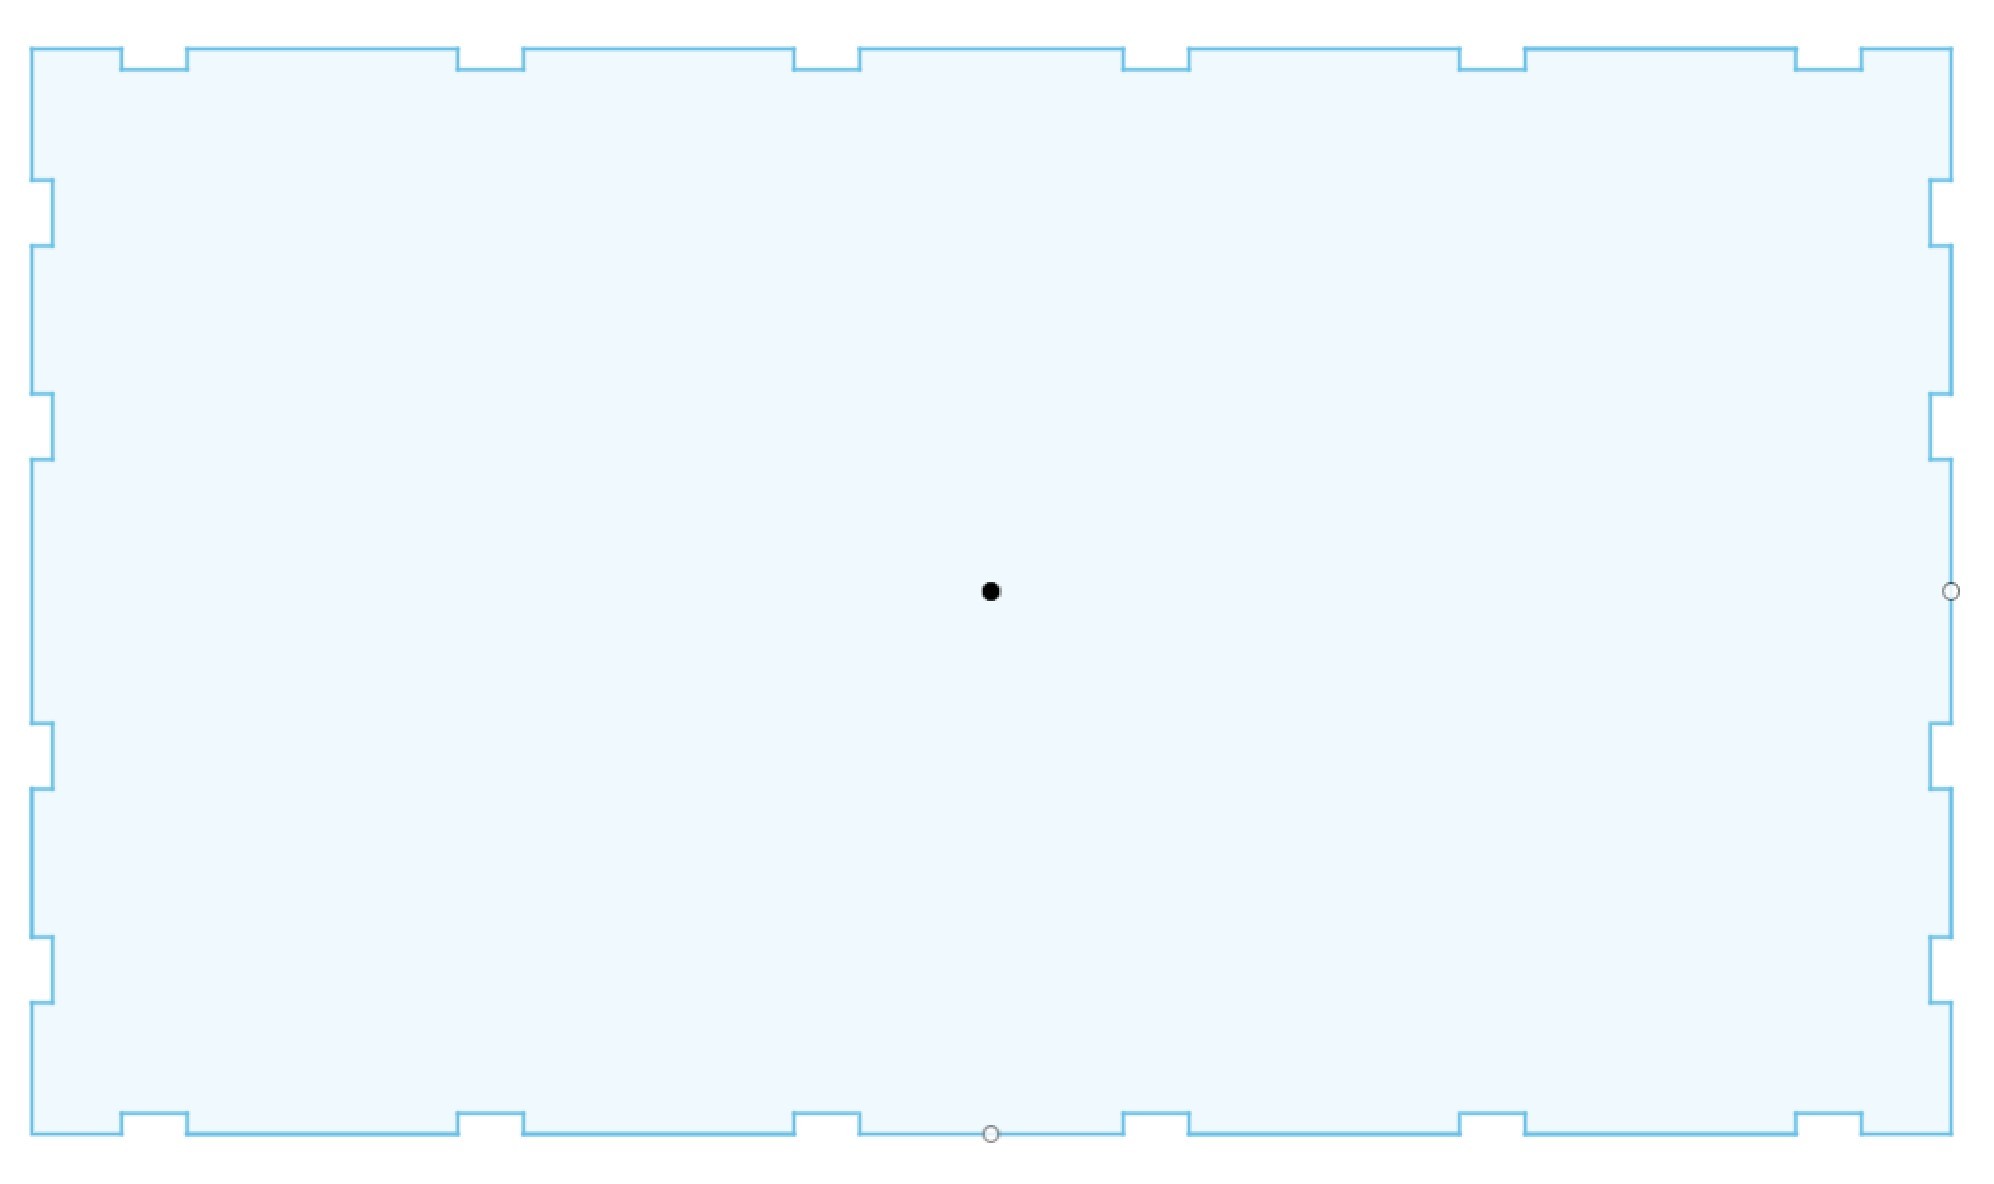
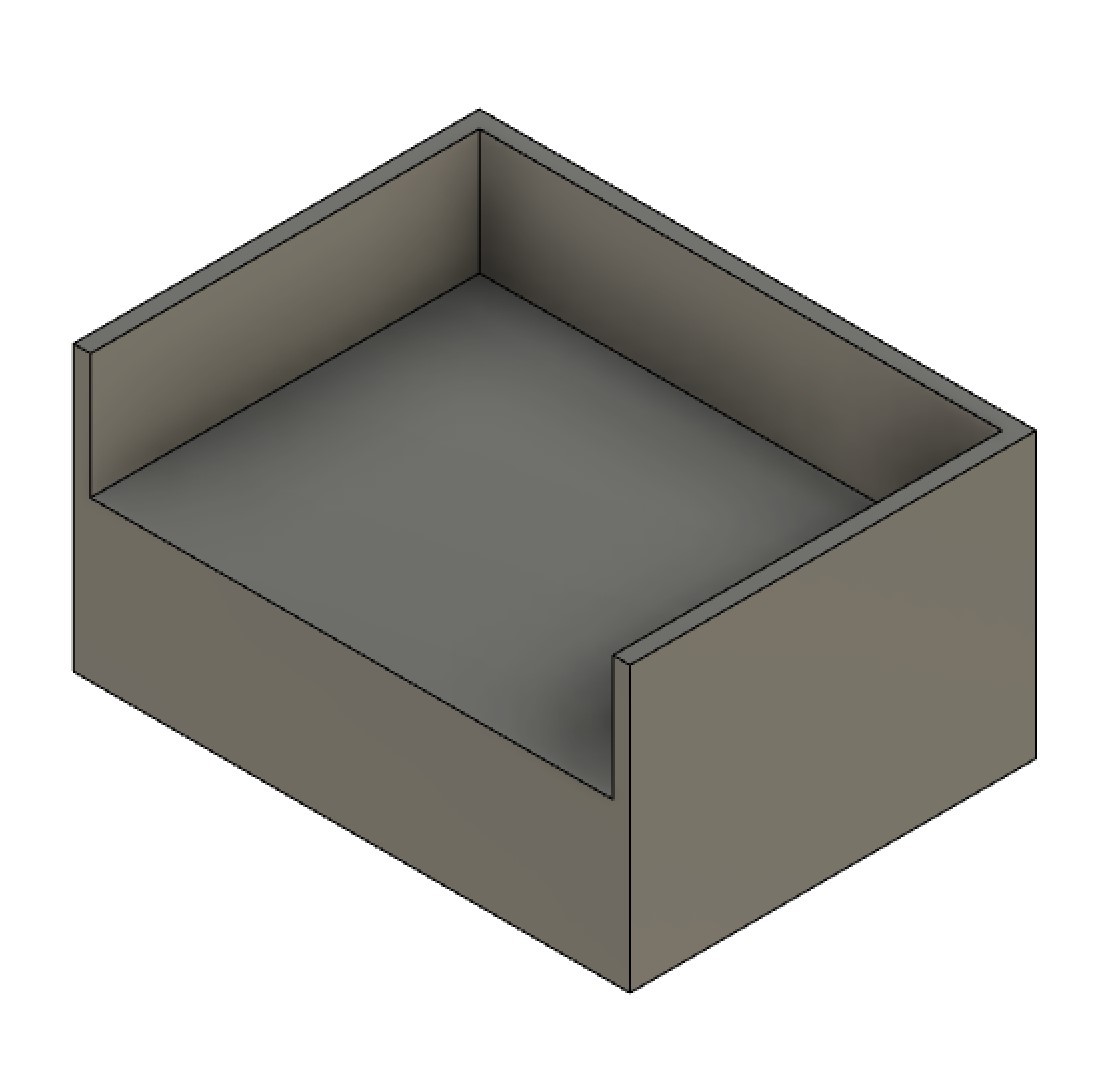
The box was designed using a simple puzzle pattern so that the teeth slots could fit into one another. The walls were then super glued together so that they could stay in place. The blue wall however was not super glued in place so we could still have easy access to the pi, the TFT and the power button for the externalbattery pack. The following images show the sketches that were made on Fusion 360 before being exported as dxf files for the laser cutter to cut.

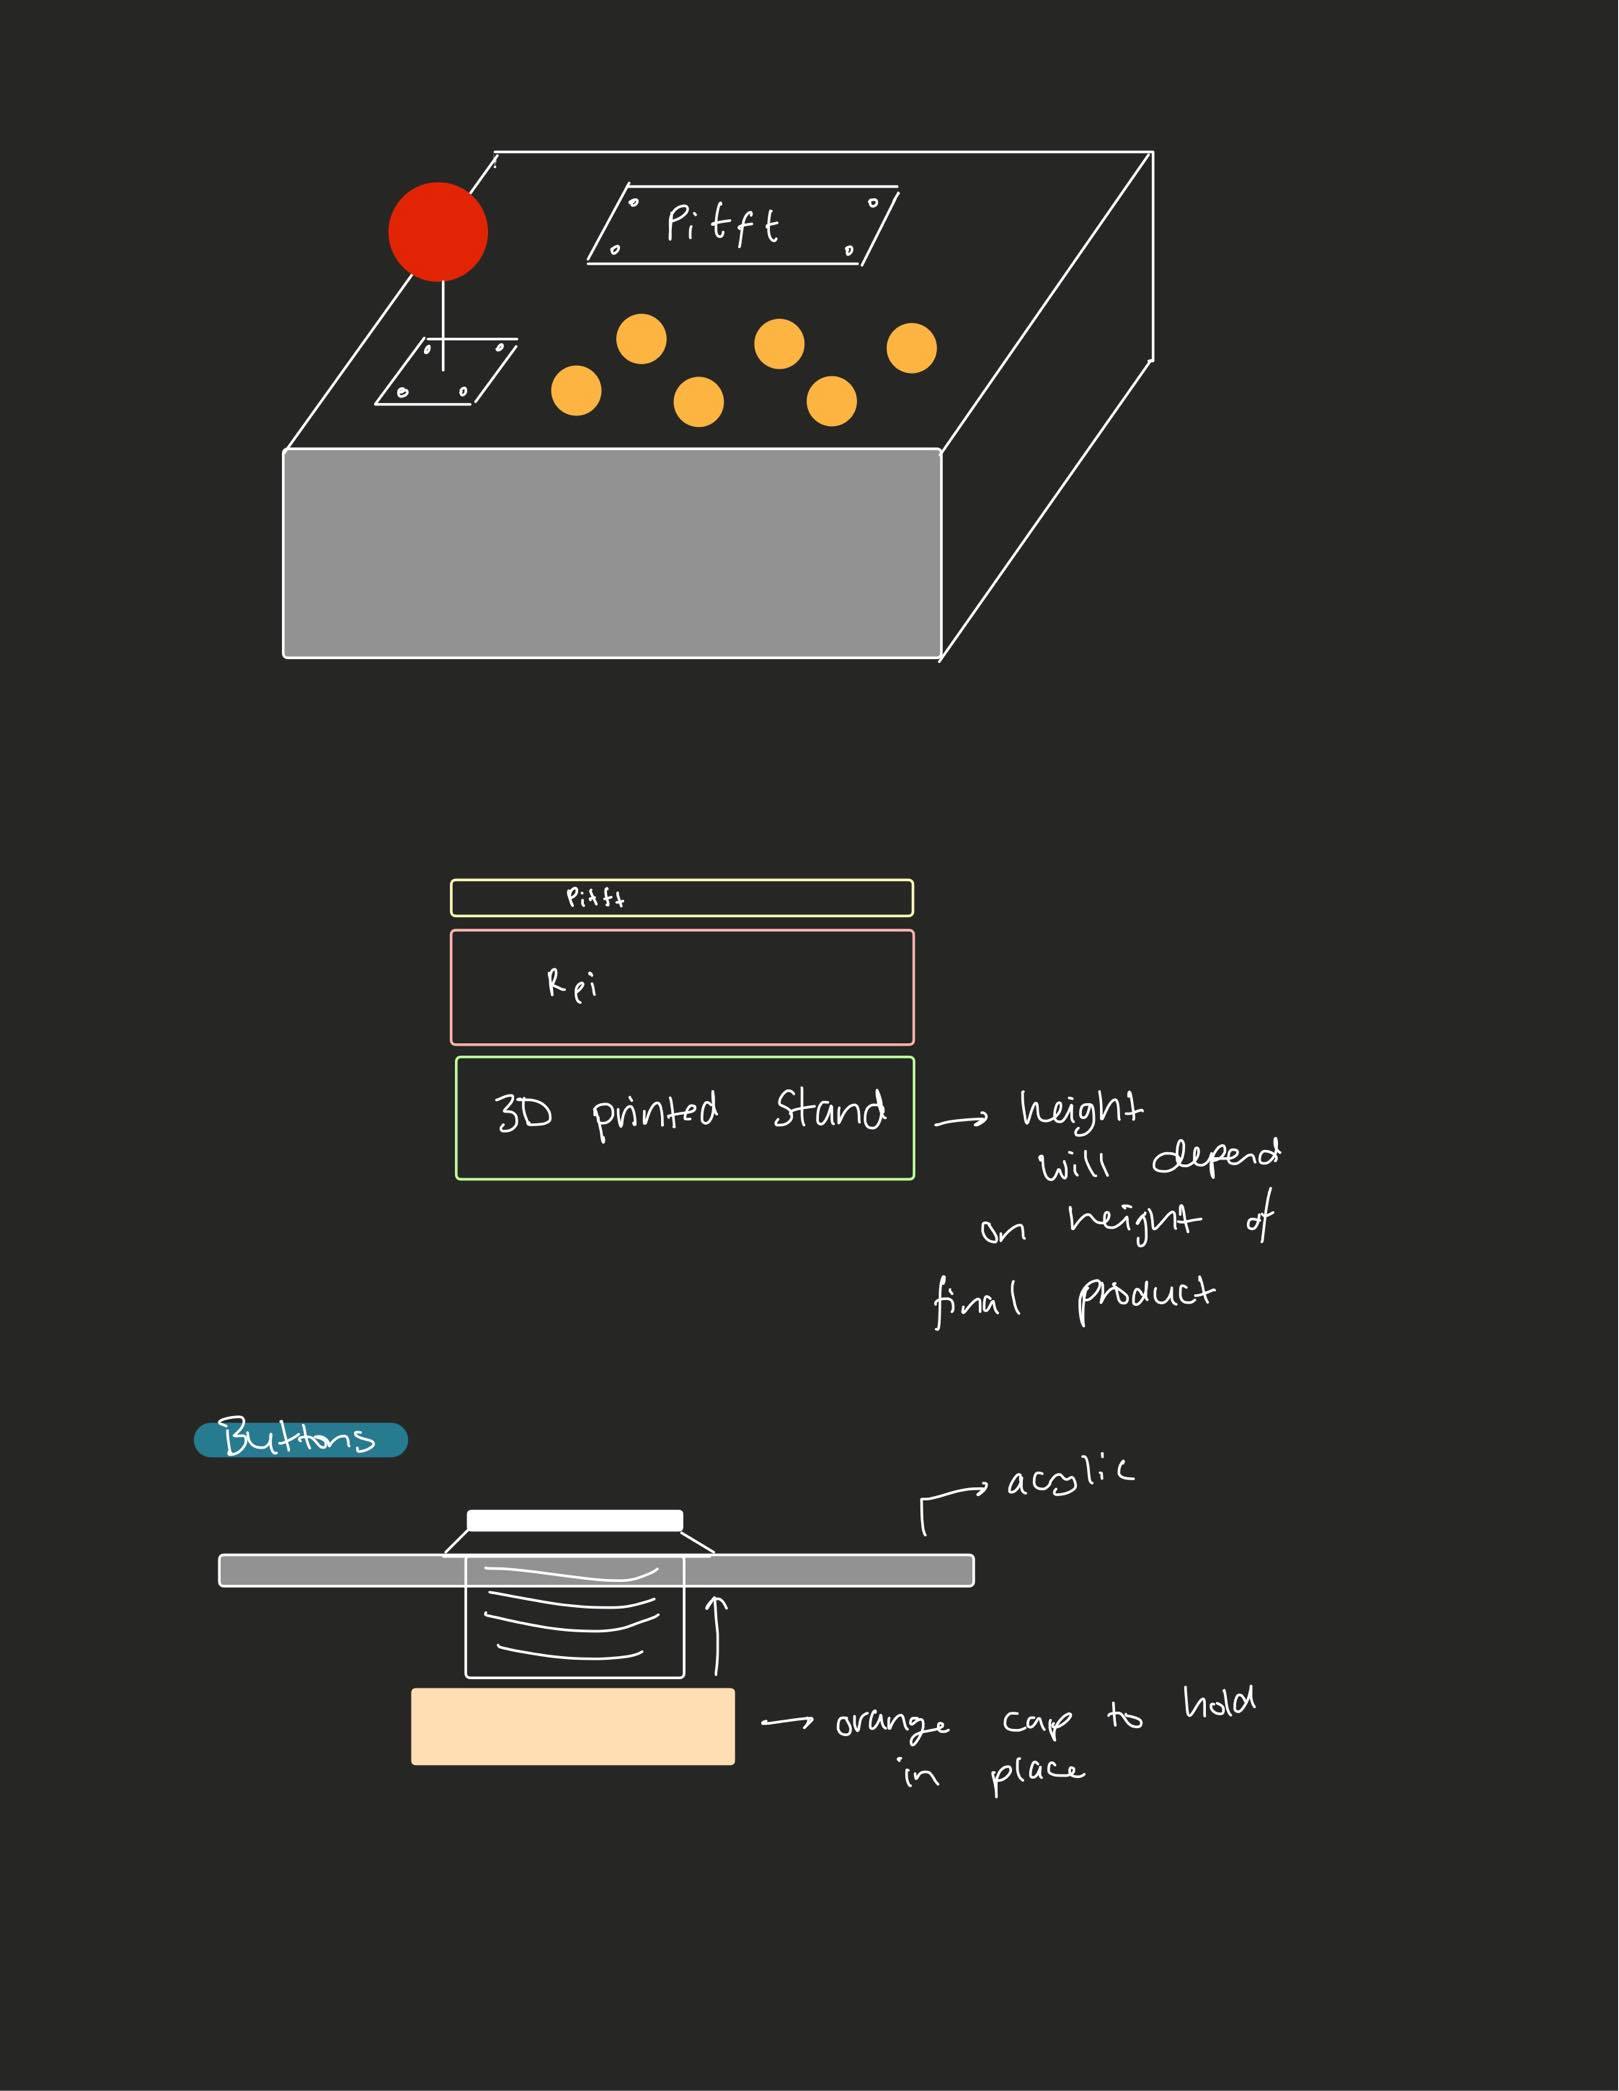
The Raspberry Pi and Pi-TFT were then raised to level on the top cover by designing a holder on Fusion 360 and 3D printing it.
The Circuit
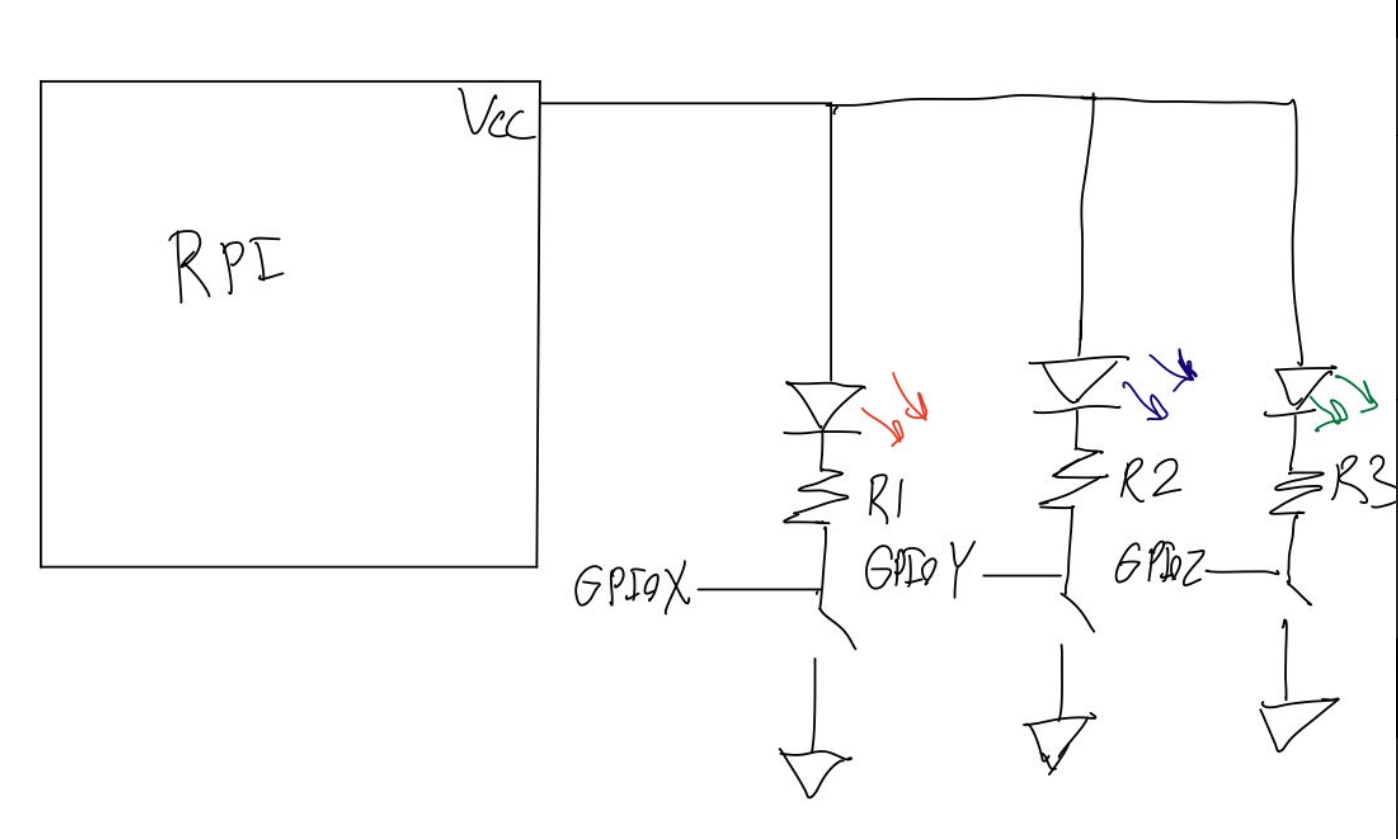
We wanted to include a feedback system for our buttons and we decided on making a circuit that would support small LEDs so that when a button was pressed, a different colored LED would light up and on the release of the button, the lED would turn off. To accomplish this, we put the LEDs in parallel with each button. On a button press, the connection with GND is made and closes the circuit for the LED.
The Finished Build
The joystick was screwed in place using two M3 scews. The buttons came with screw on parts that allowed us to easily screw the buttons inbetween the acrylic without us needing to glue them in place. We also stuck velcro on the bottom of the external battery pack and on the green acrylic so that the battery pack is ensured to stay in place. The 3D printed part then rests on top of the battery pack to make up for the space so that the TFT can peek through the rectanglar hole that was cut for it.
Software
Transmission Control Protocol
Transmission Control Protocol (TCP) is a standard that defines how to establish and maintain a network connection by which applications can exchange data between one another. For TCP, a connection must be established and maintained until every application ( or our devices in this case ) are finished exchanging messages. TCP introduces error-detection, which adds more latency to the communication. We thought it would be an interesting experiment to attempt to control games wirelessly with the Raspberry Pi to see how much latency it would provide to our application.
Client Code (Client_GPIO.py)
The Client-Side code is responsible for determining if any new inputs have been detected. It works by first creating a TCP socket and connects to the IPv4 address of the server (can be obtained using ipconfig). All inputs are added to a global input buffer which is converted to a string, encoded (with the string.encode() function), and sent to the server. It also keeps a history of all inputs in a log file which was very useful for debugging later on. In order to modularize our code as much as possible, we put all our callbacks in a separate module, callbacks.py.
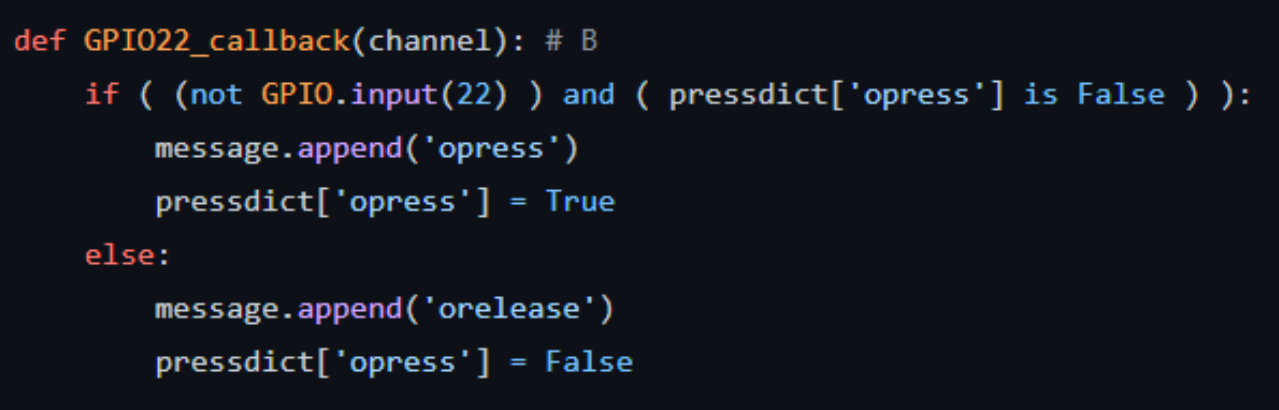
Callbacks.py
This file contains all callbacks that the Raspberry Pi uses to detect inputs. The buttons are configured to trigger a callback on the falling edge and the rising edge, to simulate pressing, holding and releasing a button. with a very small bouncetime (approximately 20), to account for the situation where the player may want to mash a button. We also implemented some software debouncing so that the Pi would not detect multiple inputs when a button is pressed only once. We made a dictionary that keeps track of the current state of our button presses.
Server Code (server_final_v1.py)
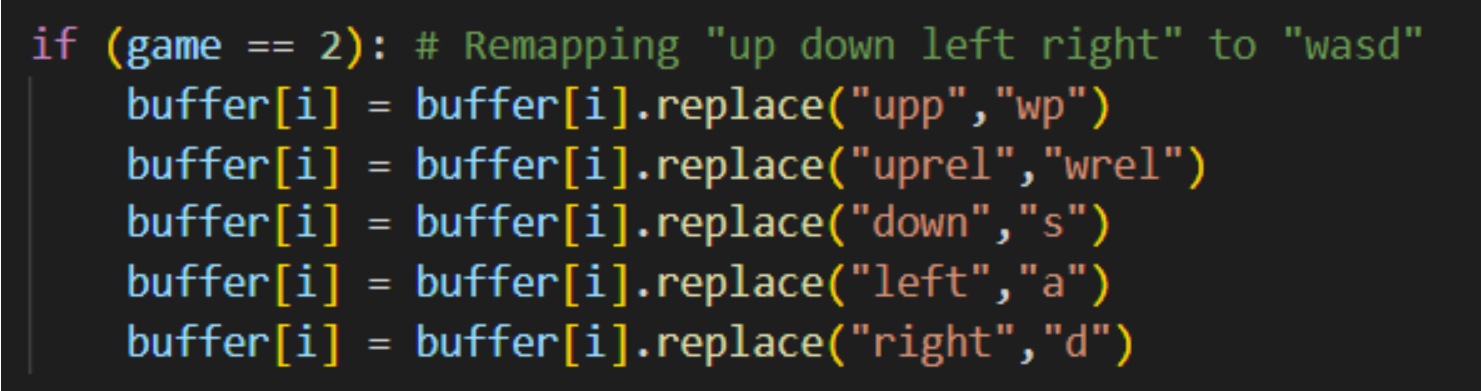
The server host (the computer running the game) exclusively serves to receive inputs from the client, parses them, and calls the keyboard.press and keyboard.release functions to simulate buttons being pressed, held and released. Firstly, a socket is created and bound to an address, after which sock.listen() and then sock.accept() is called, which is a blocking statement that waits for a connection to be requested by a client. The server will then receive 4096 bytes ( to ensure the entire buffer is received) of data, and appropriately reconvert it into a list by getting rid of any trailing bracket characters ( as they are now part of the string). If the server receives a number from the client, it will remap the controls, and will change the function of the buttons pressed.
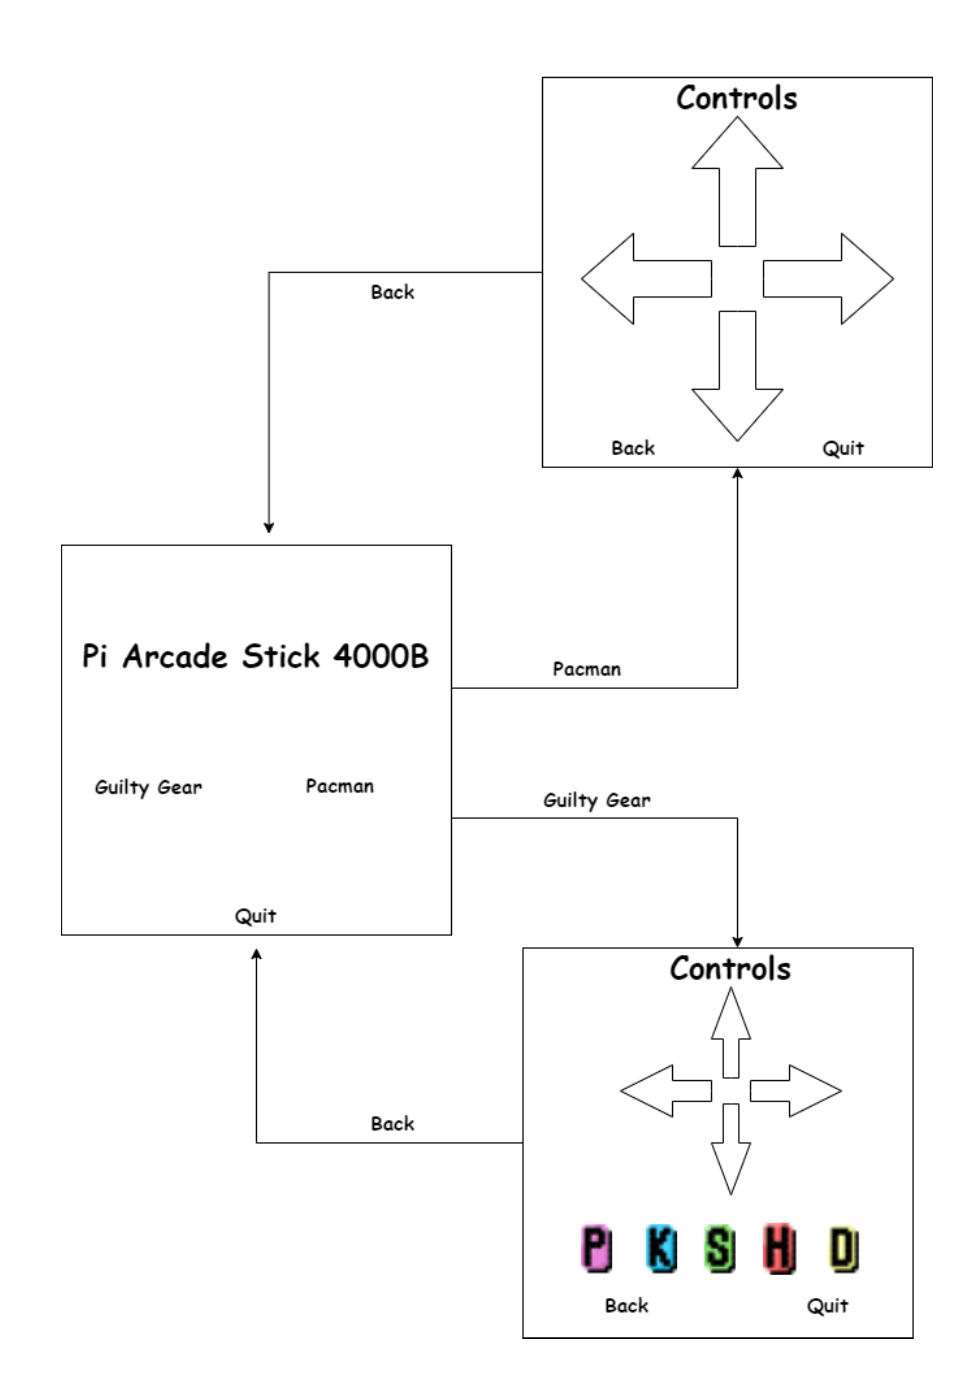
GUI.py
The last thing we implemented for our Arcade Stick was an interactive PiTFT GUI, as shown below. The GUI gives visual feedback depending on which buttons are currently pressed as confirmation that the player is pressing the button they meant to. We first defined all the GUI elements: the coordinates of all the text, and any images we needed. In the main while loop, we rendered the elements on the PiTFT screen depending on what “level” we were on. The level variable simply determines which elements to generate on the screen. In order to update the elements depending on which button was pressed, we would poll, instead of using interrupts, to update the colors of the buttons and arrows which turned out to be an easier way to implement them.
Appendix
Bill of Materials
- 2x 12x12x1/8" transparent acylic
- 12x12x1/8" dark blue acrylic
- 6x arcade buttons
- Small arcade stick
- Raspberry pi 4
- Pi-tft screen
- 3D printed raspberry pi stand
- 6x 1kOhm resistors
- Jumper cables
- External battery pack
- Velcro
Github Repository
Authors and Contributors