Milestone 2: Wall Following
Introduction
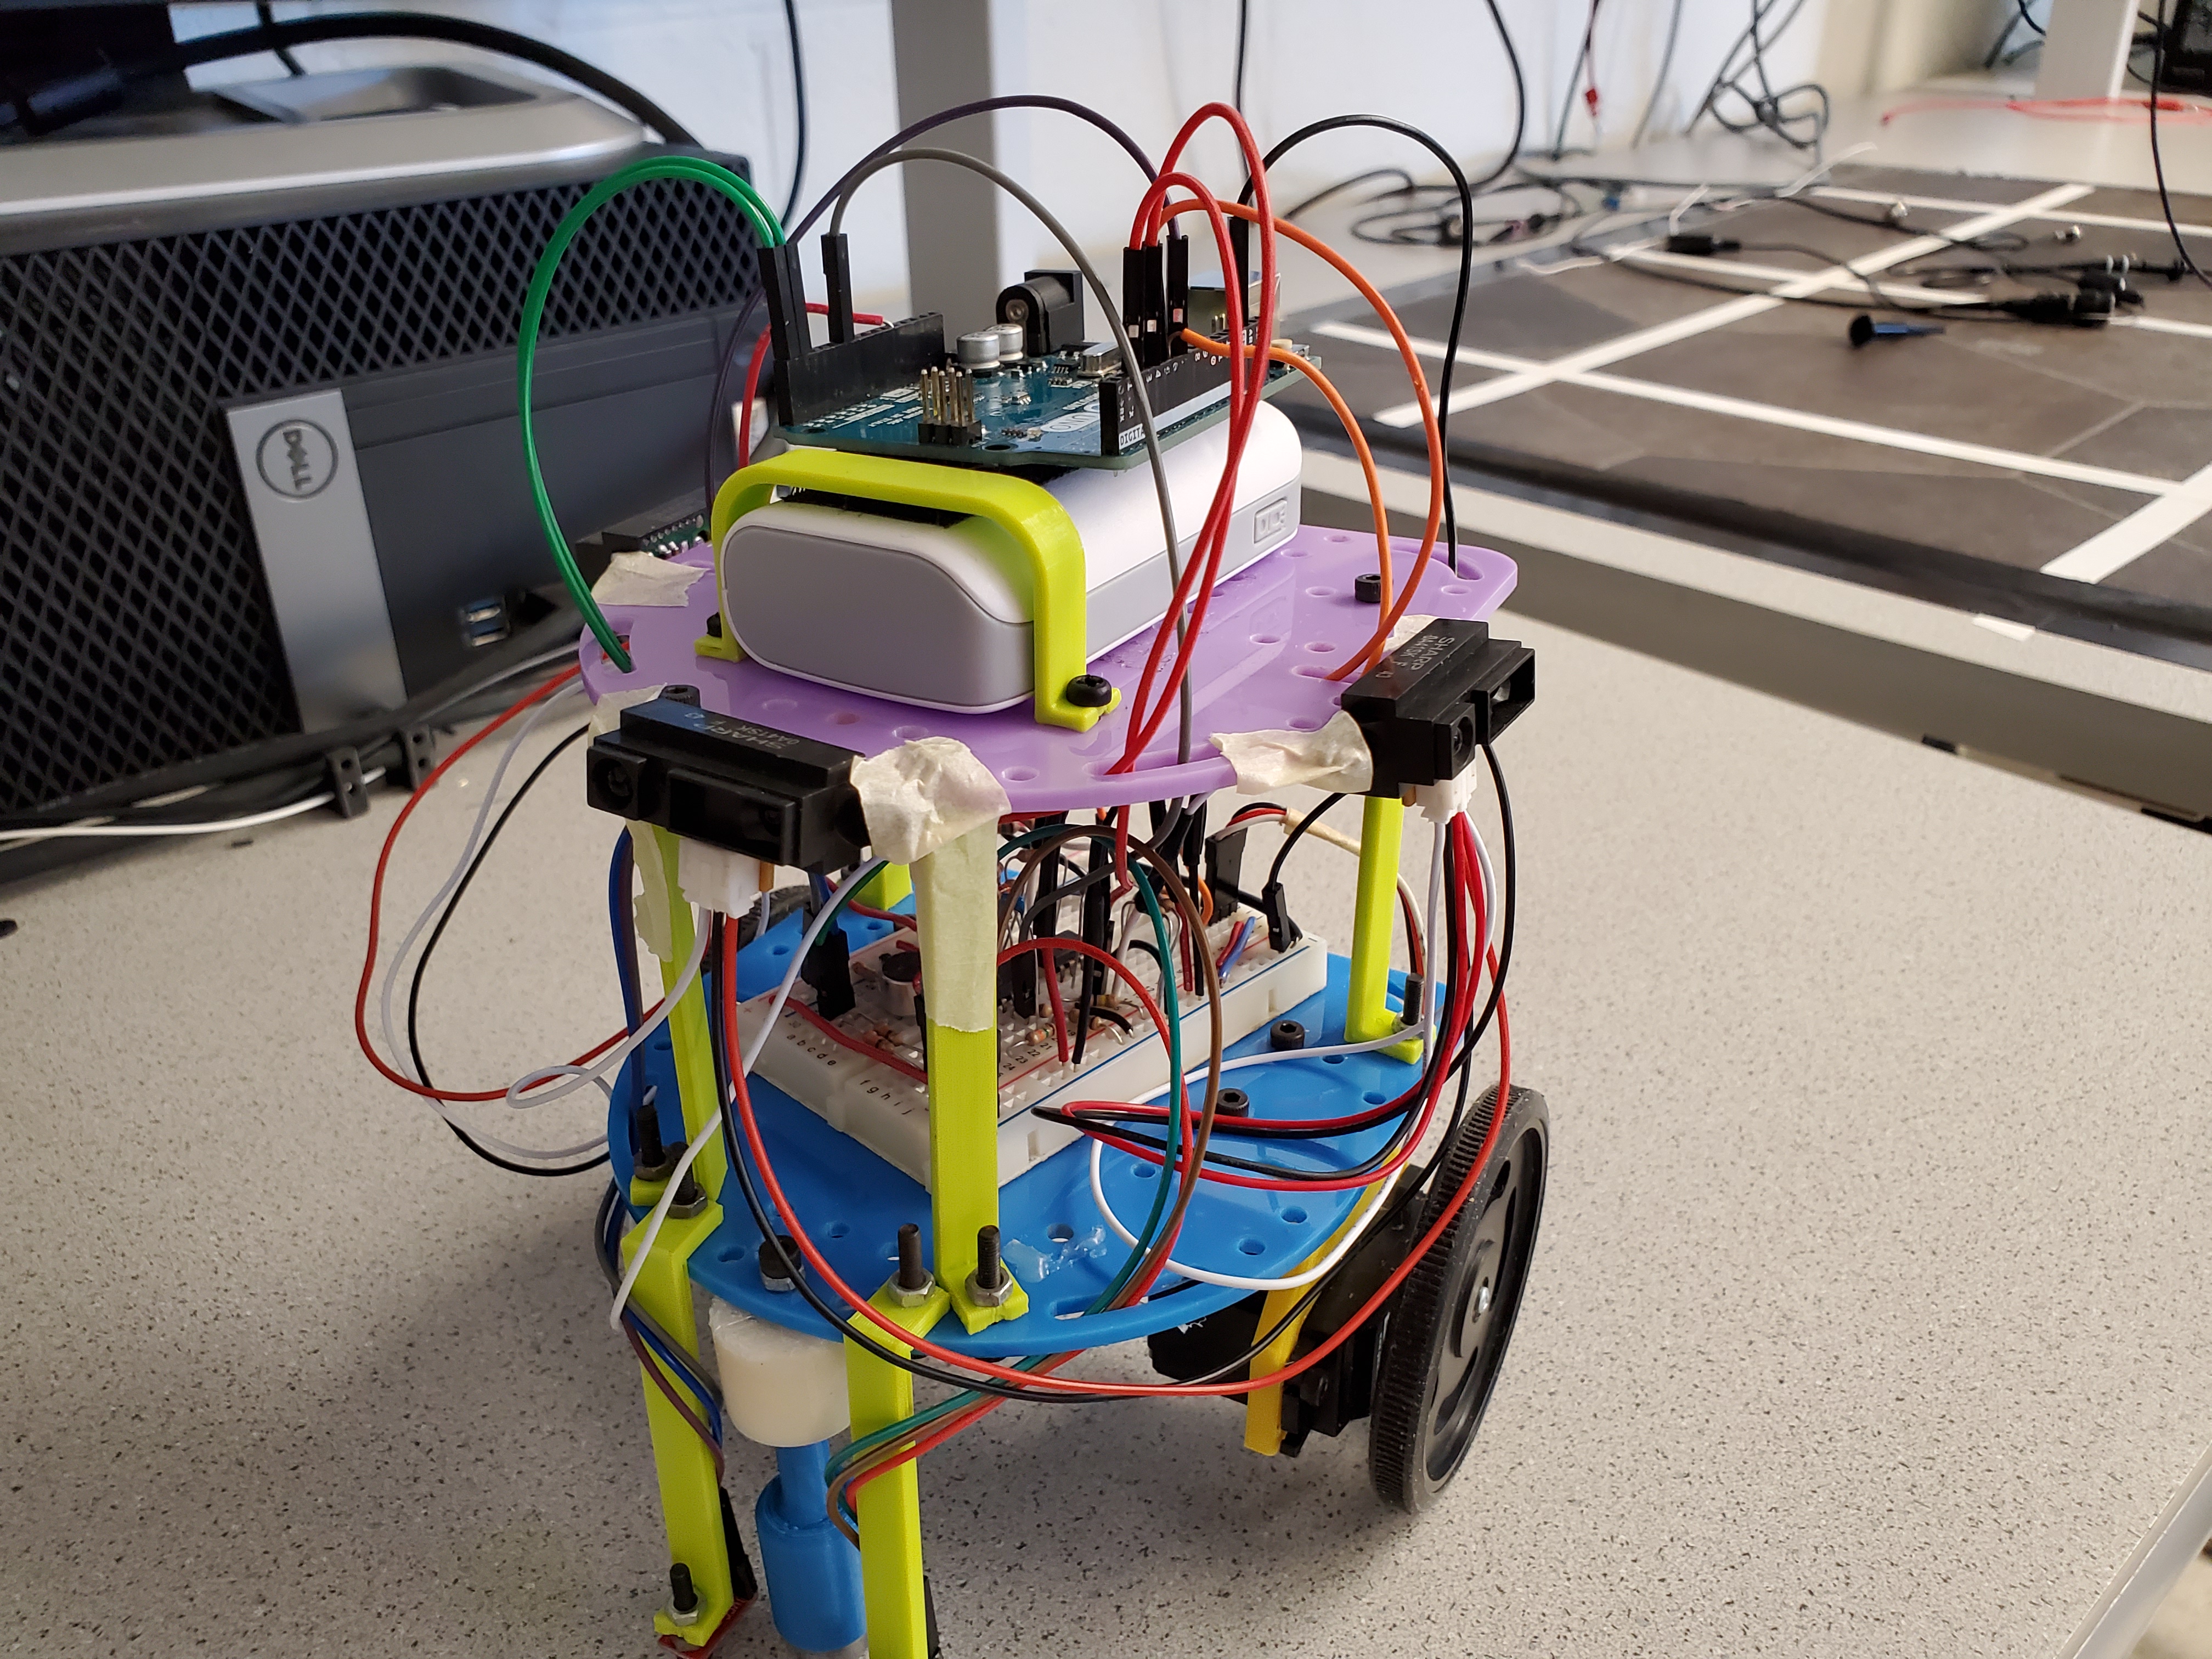
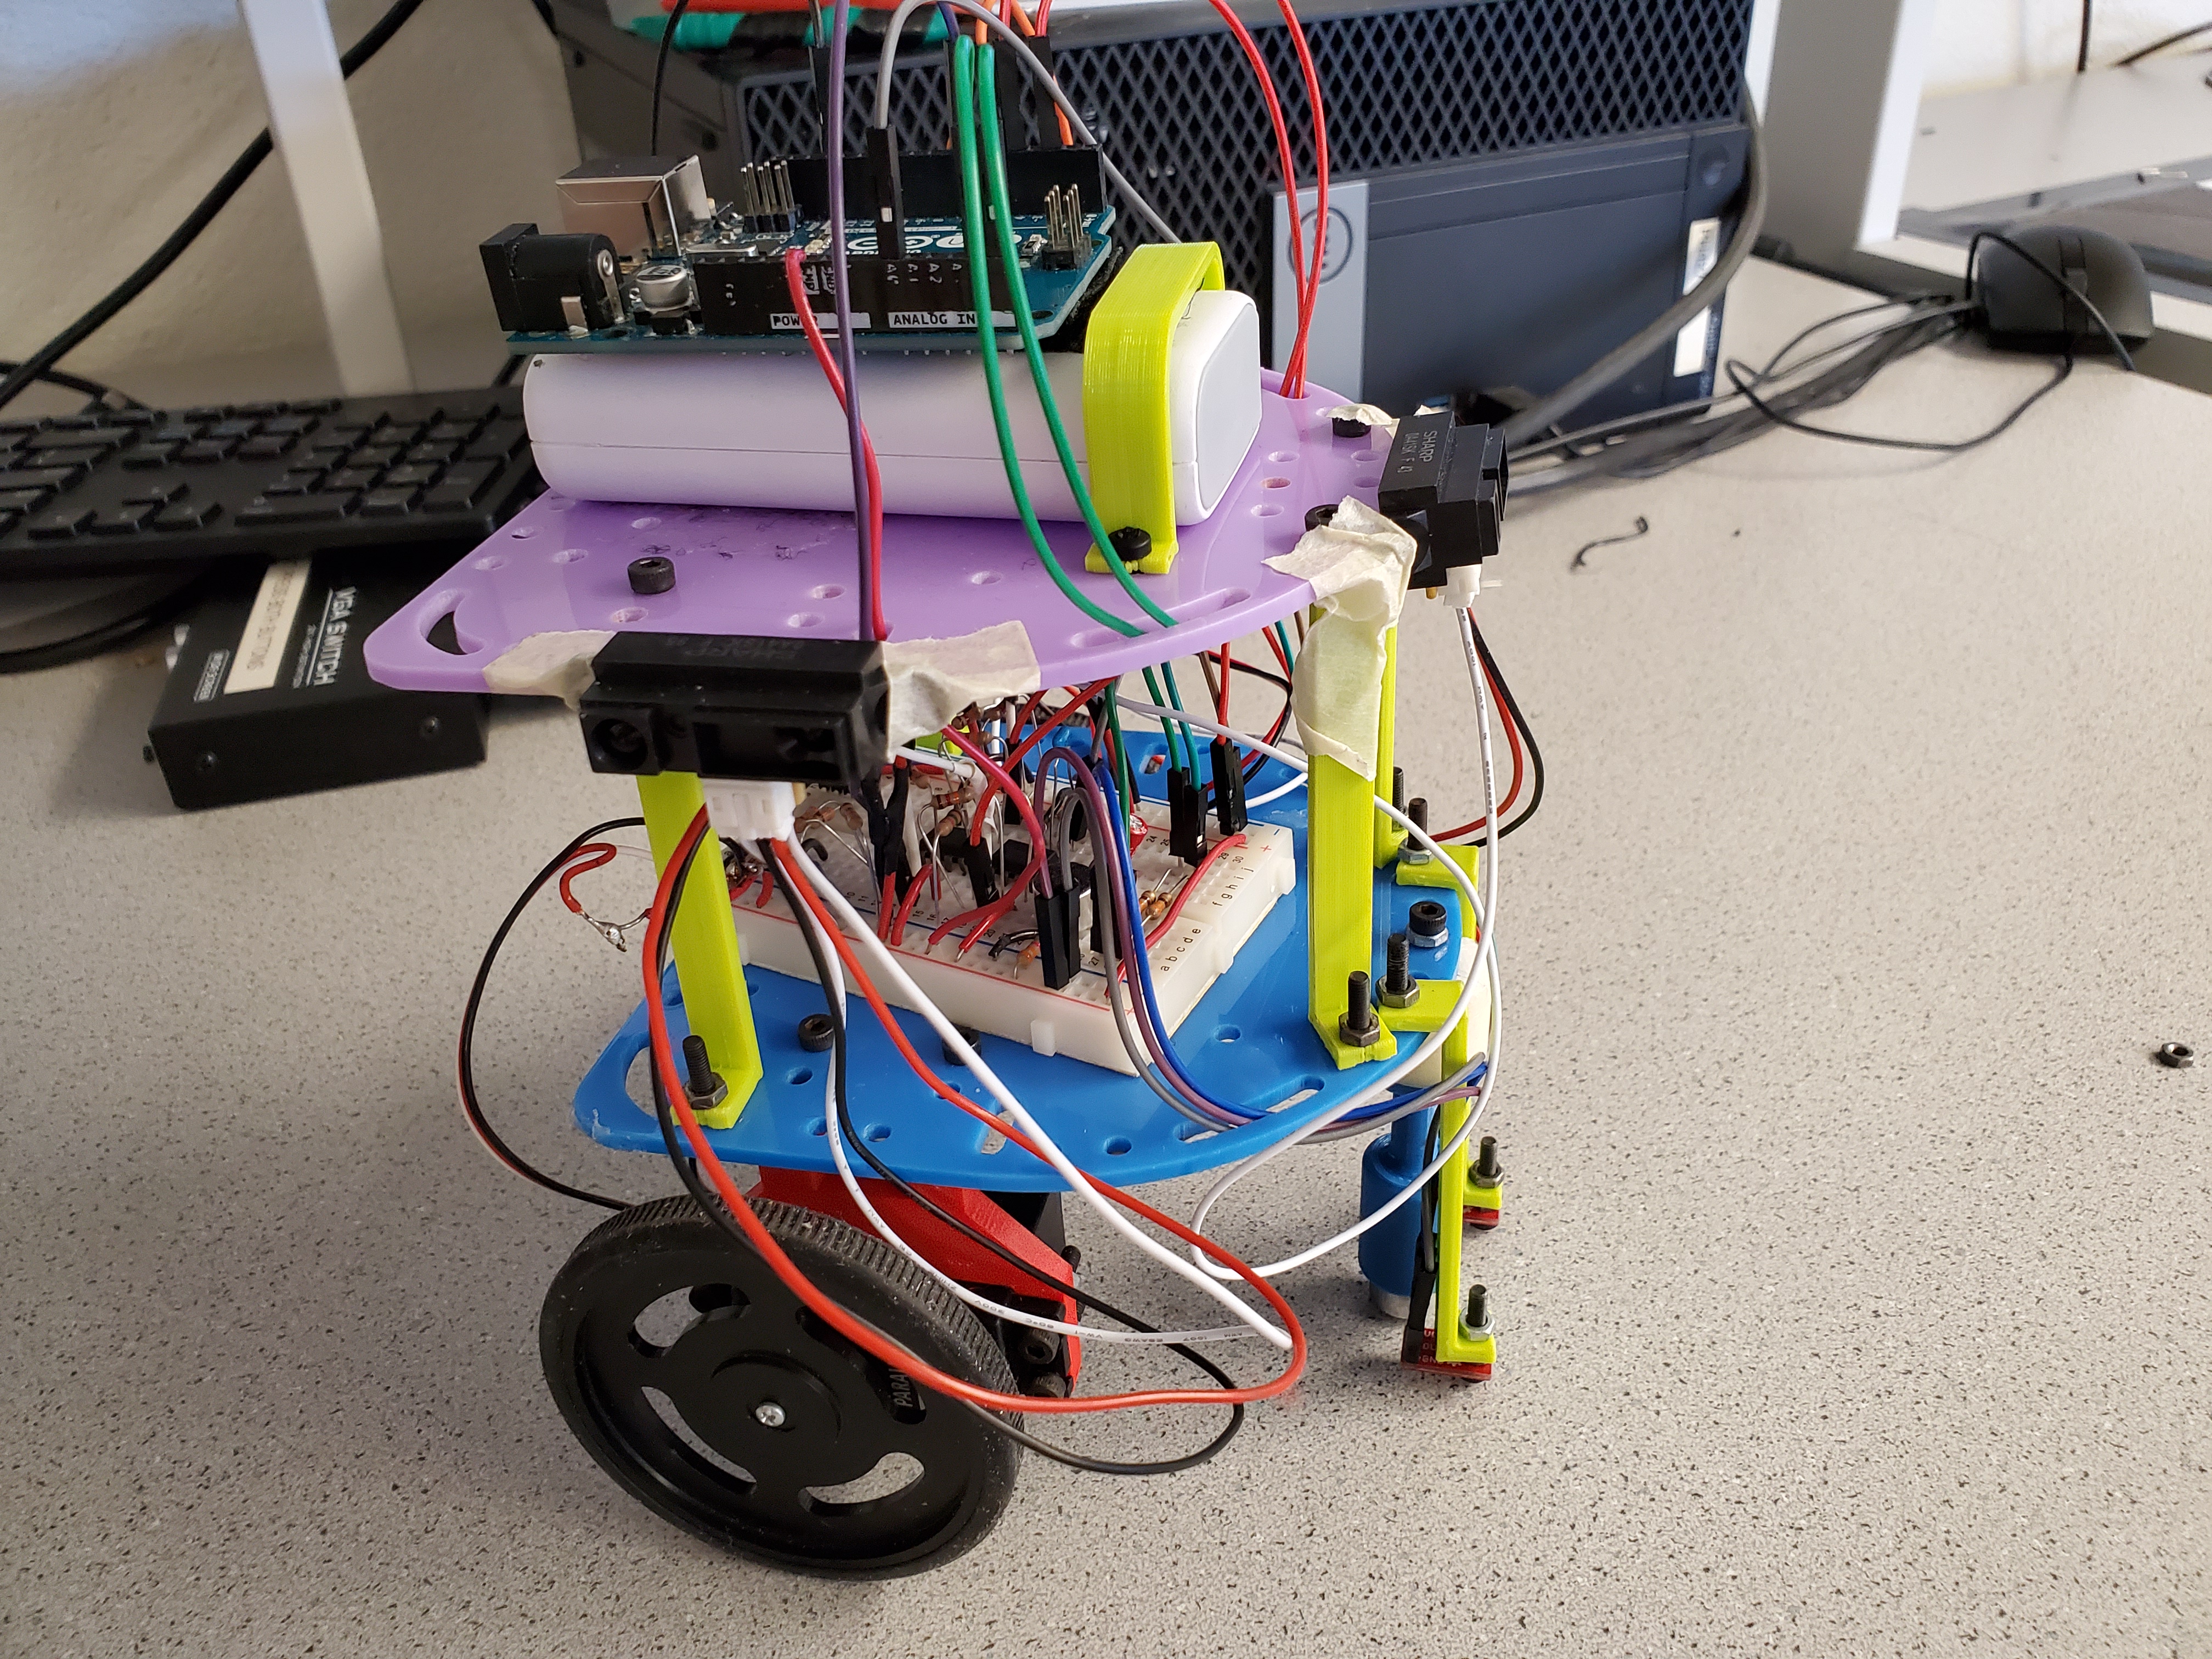
The milestone that was achieved involved having our robot first successfully circle an arbitrary set of walls and then demonstrate that our robot does line tracking and avoids walls at the same time. In order to reach this milestone, we had to rely on the Arduino coding and breadboard wiring skills learned in Labs 1 and 2 to utilize input from line sensors as well as infrared wall sensors to ensure the robot stayed on track while not hitting a wall. We chose to use three IR sensors, and attached them on the sides of the top platform. We made sure to place them such that they are approximately at right angles from each other. You can see our placement in the photos below.


Joy and Dan were the two that worked on this milestone. Jinny and Ryan worked on the FFT analysis of Lab 2 during this time. They also began working on the robot detection section of this milestone before that part was switched to Milestone 3.
Wall Following and Line Tracking
This milestone was extremely easy because of the work we completed in Milestone 1 and Lab 2, so we will discuss both the wall following and line tracking requirements together. Our Schmitt Triggers convert the analog output from the IR sensors into a digital 0 or 1 and this allowed us to use a series of simple if- and elif-statements to check for certain conditions to be met (and also allowed us to free up three analog ports on the Arduino). As suggested, we used right-hand wall following to navigate our robot.
We wrote very adaptable code in Milestone 1, so we were able to reuse all our code from the line following section. The only place where we had to make major changes was when both line sensors detected white, which happens when the robot reaches an intersection. Instead of simply continuing to move forward, we added logic to see where the robot should move next, which is where the IR sensors and Schmitt Triggers come into play. We designed inverting Schmitt Triggers so in order to see if a wall is detected, we check to see if a sensor reads 0. In all cases, if we can turn right, we do (in accordance with right-hand wall following). If we can’t, then we look at the current wall setup and react accordingly. The full set of if- and elif-statements are shown in an abbreviated version of our code below and are labeled on a case-by-case basis. Again, a lot of the code is exactly the same as that of Milestone 1 so we excluded a lot for brevity and to highlight what we completed in this milestone alone.
Below are two videos showing different mazes that Axel (our robot) successfully traverses using the logic and hardware described above. The first maze consisted of a simple rectangle with a divider in the middle and one alcove to test turning around. The second maze was a more complicated design, featuring a rectangle with a divider, an open square, and an alcove right from the beginning.
Clearly, our robot traverses the mazes successfully and continues to track the line. While there is a half-second delay between moving forward and beginning to track the line, this was a sacrifice we needed to make in order to better detect walls and turn properly.
// This program allows the robot to nagivate any arbitrary set of walls.

... // Declarations

... // Moving commands (i.e. forward, turn left/right/around,
... // slight left/right to correct during straightaways, etc.)

void navigate() {

  // if both sensors on white
  if (left_sensor_value < threshold && right_sensor_value < threshold) {

    // Move forward and prepare to potentially turn.
    moveForward();
    delay(500);

    right_detect = digitalRead(right_ir_sensor);  // 0 when detecting
    left_detect = digitalRead(left_ir_sensor);   // 0 when detecting
    front_detect = digitalRead(front_ir_sensor);  // 0 when detecting

    // case 0: no walls --> turn right
    if (right_detect && left_detect && front_detect) {
      right90Turn();
    }

    // case 1: right wall, left wall, front wall --> turn around
    else if (!right_detect && !left_detect && !front_detect) {
      right180Turn();
    }

    // case 2: left wall, front wall --> turn right
    else if (right_detect && !left_detect && !front_detect) {
      right90Turn();
    }

    // case 3: right wall, front wall --> turn left
    else if (!right_detect && left_detect && !front_detect) {
      left90Turn();
    }

    // case 4: front wall only --> turn right
    else if (right_detect && left_detect && !front_detect) {
      right90Turn();
    }

    // case 5: left wall only --> turn right
    else if (right_detect && !left_detect && front_detect) {
      right90Turn();
    }

    // case 6: otherwise --> go straight
    else {
      moveForward();
    }
  }

  // left on white, right on black --> slight left adjust
  else if (left_sensor_value < threshold && right_sensor_value >= threshold) {
    // left detects white, right detects black
    while (left_sensor_value < threshold) {
      slightLeft();
      left_sensor_value = analogRead(LEFT_LINE_SENSOR);
    }
  }

  // right on white, left on black --> slight right adjust
  else if (left_sensor_value >= threshold && right_sensor_value < threshold) {
    // left detects black, right detects white
    while (right_sensor_value < threshold) {
      slightRight();
      right_sensor_value = analogRead(RIGHT_LINE_SENSOR);
    }
  }

  // both sensors detect black --> go straight
  else if (left_sensor_value >= threshold && right_sensor_value >= threshold) {
    moveForward();
  }
}

... // setup

void loop() {
  // put your main code here, to run repeatedly:
  navigate();
}
Conclusion
Overall, this milestone wasn’t very difficult at all. We did, however, encounter a few problems. For a decent amount of time, our robot wasn’t detecting intersections. We included a halt command every time it hit an intersection and it continued to miss the detections. Remembering Milestone 1, we took a cleaning wipe to the tape on the floor and it was not longer a problem. In addition, our robot didn’t always turn where expected at first. This puzzled us greatly; we tested the Schmitt Triggers extensively so that couldn’t have been the issue. We eventually realized that somehow, two of the IR sensors (front and left) busted and were giving out garbage readings so we replaced them. These two new sensors gave out slightly different readings so we took some measurements, calculated slightly different resistor values for the Schmitt Triggers, and hooked them back up, only to find we still had issues. After some time, we switched out the 741 op amps being used for the front and left sensors for LM358 op amps, and this fixed the problem instantly. The right sensor was already using one of these, but shared the chip with our microphone circuit so we had to find more chips. Unfortunately, all that was left were the 741s at the time we began the milestone, but we managed to scour another IC (which has two op amps on it) when we needed it most. The LM358s are the true heroes of Milestone 2. With these on our breadboard, we had no problem completing the lab. Our final issue was the lack of parts available to us. This included working op amps (as discussed above), as well as the lack of mounts for IR sensors. As seen in our photos above, we had to tape our IR sensors to the robot. This was because many other groups had upwards of five or six IR sensor mounts, leaving none for groups in the Monday night lab like us. This was the only truly frustrating part of this milestone.
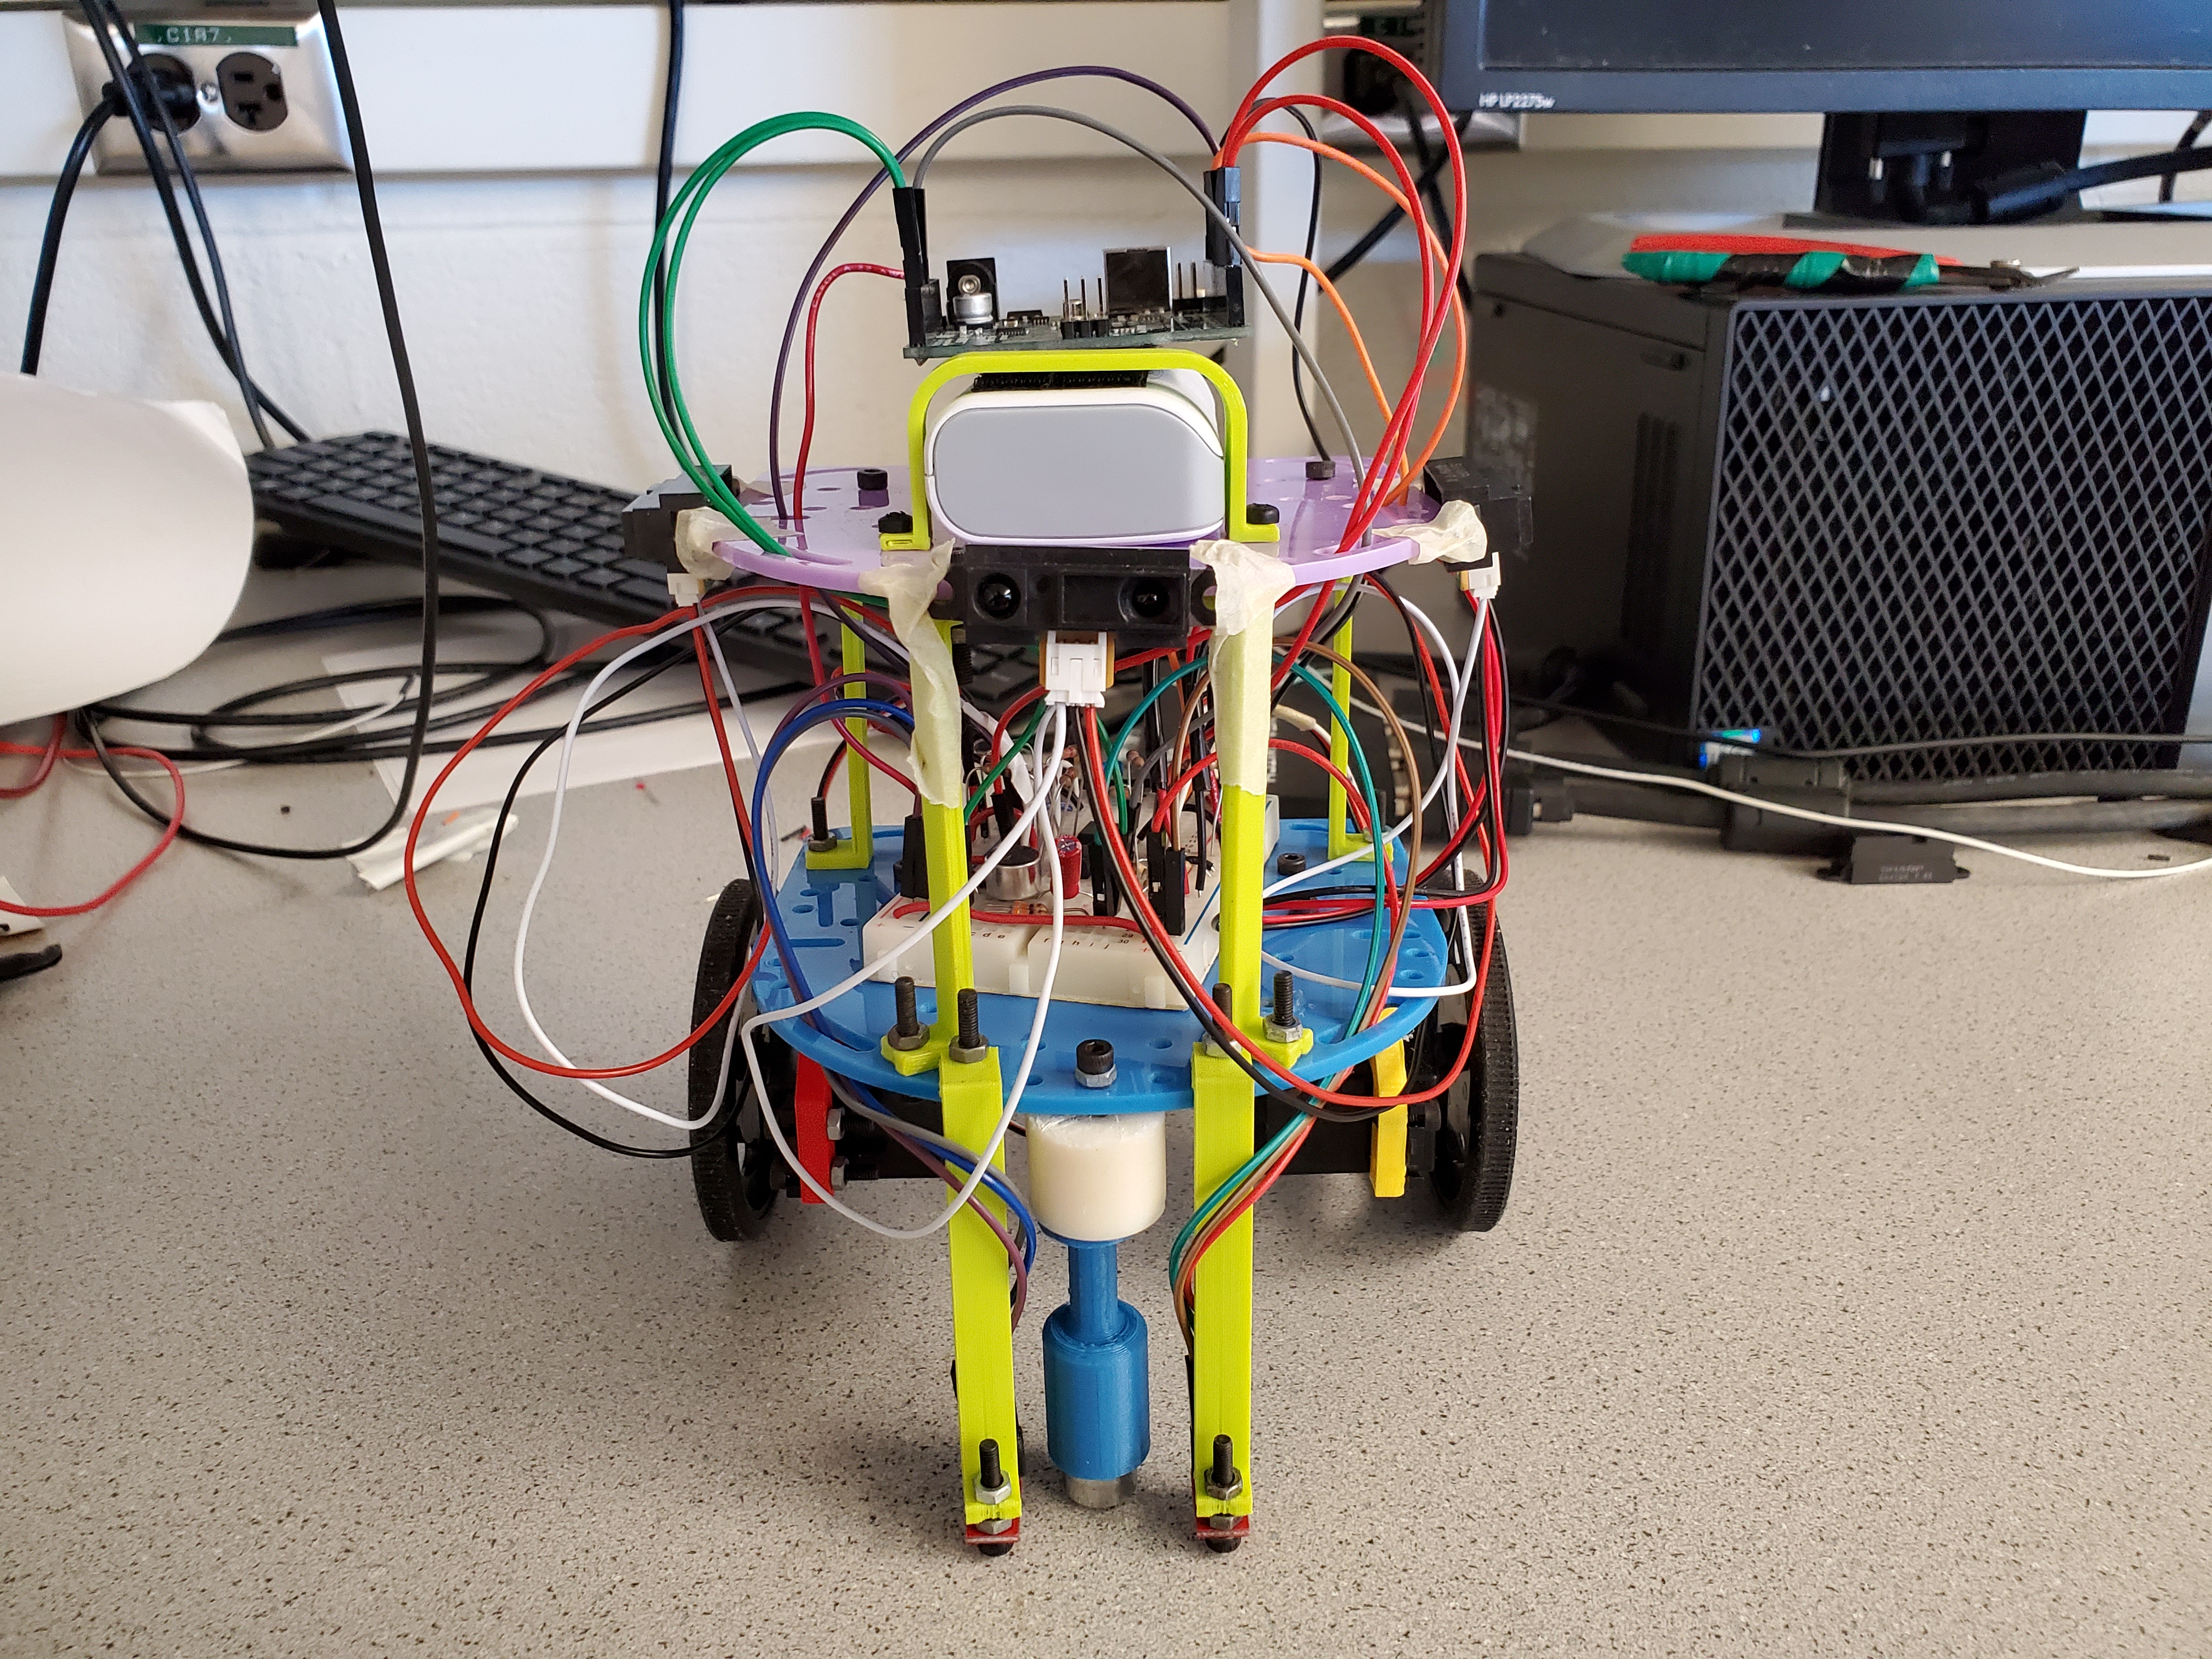
At the end of this milestone, our robot was successfully able to circle walls and track lines together using right-hand wall following. We will leave you with a final head-on updated picture of Axel. Enjoy!
