Objectives
- Gain undertsanding of how the simulation works
- Demonstrate ability to design an open and closed loop controller in the simulation
Simulation Functionalities
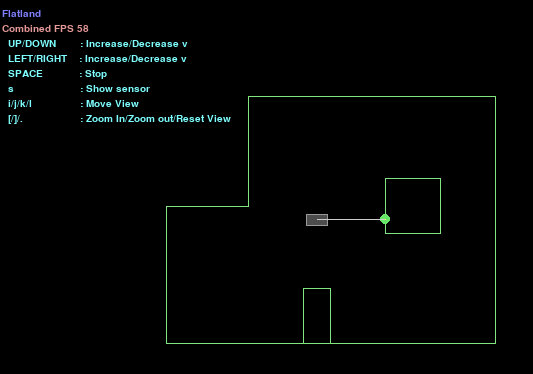
The simulation is composed of the simulator, the plotter, and the controller. The use of the simulation is to virtually represent our real world robot. The simulator is a 2D environment that conisits of a robot with a forward facing range finder, and a small room with some obsticales. Below is a picture of the simulator.
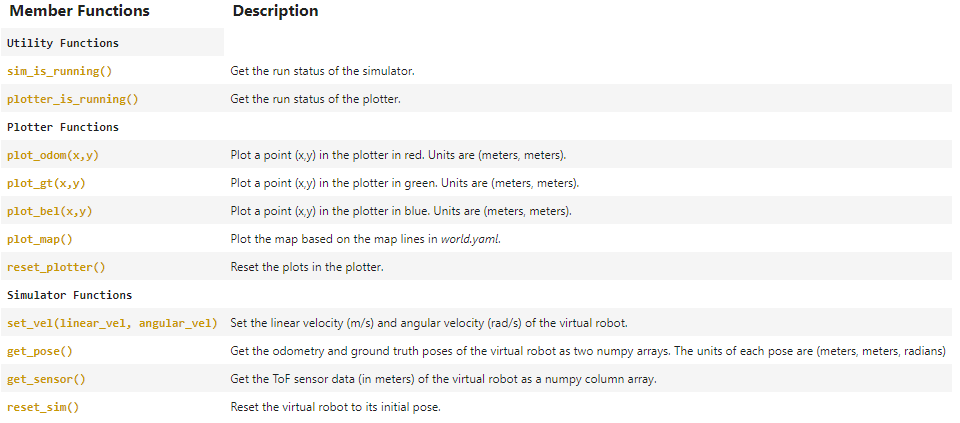
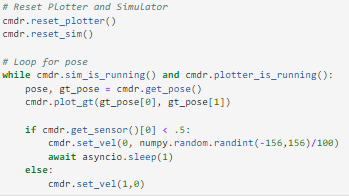
We can use the controller to manually move the robot with computers keys, or call functions to move them systematically. The controller can also return to us the odometry, ground truth, and ToF sensor data. We can them plot this data with the plotter to easy visualize the data. Below are examples of the code, we can call to control the robot, plot data, and operate the simulation.
All of this combined gives us great functionality to test our philosophy of controlling our real world robot, by seeing how our algorithms would work hypothetically.
Open Loop Control
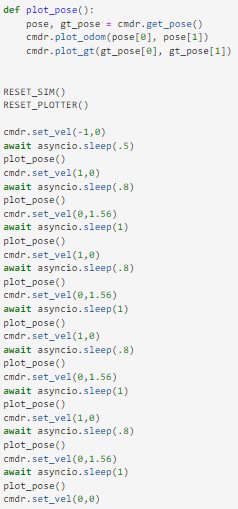
The goal for this part of the lab is to make the robot travel in a square using open loop control. In doing so, we got to understand the difference between ground truth and odometry, and more about the intricacies of the simulation. To make the robot move in a square, I hard coded each movement (ie moving straight and turning 90 degrees) and recorded the data after each movement. Below is the code, along with the times and speeds, I used to get my robot to successfully traverse a square loop.
Below shows the corresponding ground truth (green) and odometry (red) data for three trails of executing a square loop.
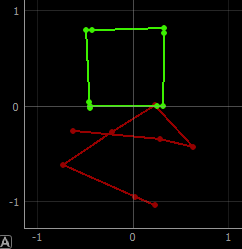
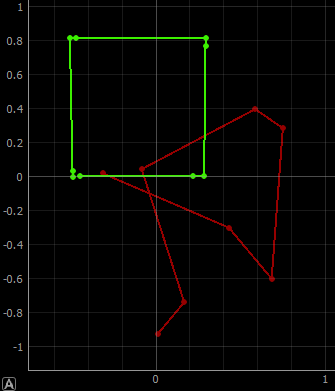
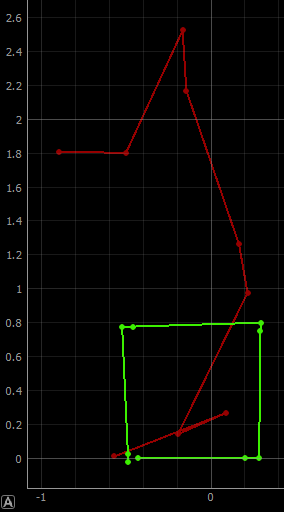
As shown by the plots above, the ground truth and odometry vary very much from each other. Ground truth in the simulation represents the actual position of the robot in the environment.This tells us that relying on the robots IMU data to dervive position is unreliable, and thus alternative measures must be taken to successfully determine the robots current position. You can also notice that the square that the robot executes is not exactly the same after each trail. This is because my code utilizes the line: await asyncio.sleep(x). This line "sleeps" on a time depending on your operating system and computer, so it varies from computer to computer, and also from trial to trial.
Closed Loop Control
Using closed loop control, I designed a simple algorithm for the robot to move around the environment and actively avoid obstacles, using only the robot's forward facing ToF sensor. When the robot came half a meter a wall, the robot would initaize its turn. To begin, I just made the robot turn 90 degrees to the left, which is shown in the video below and it is followed by the ground truth plot. This trial had the robot only move at 1 m/s, which is a relatively slow.
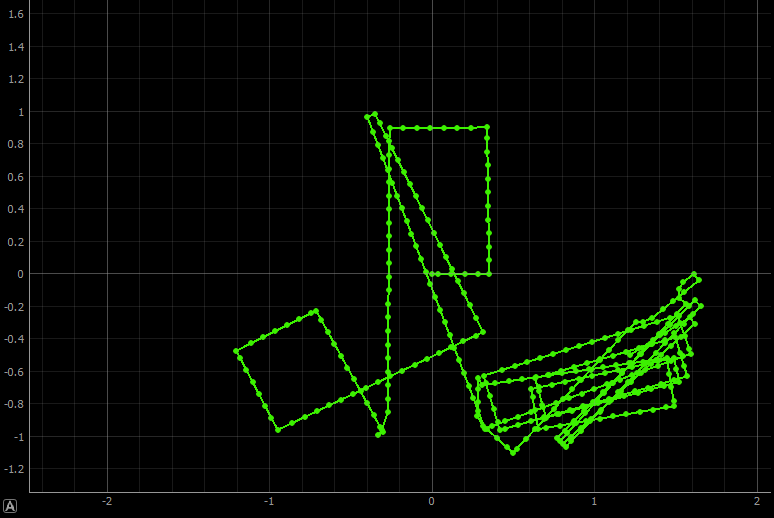
Next, I boosted the speed to 5 m/s, but since the robot can stop instantaneously, the speed in between each turns did nto effect if it crashed into the walls. In a real life scenario, the robot will not be able to stop in an instant, so it will have a max speed. I will most likely implement a PID so the real life robot can stop when needed. The 5 m/s trial is shown below along with the ground truth plot.
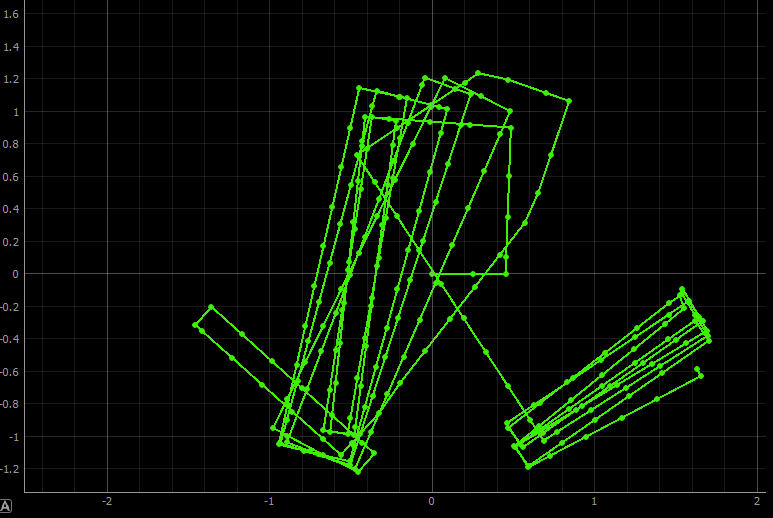
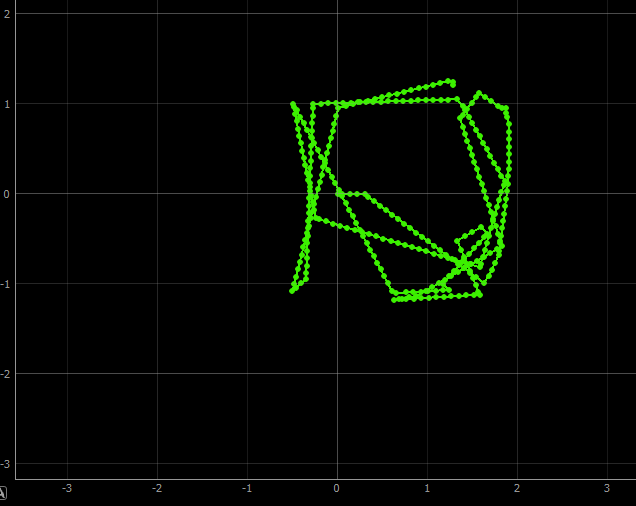
Overall, the above trials were sucessfull, but because the robot turned 90 degrees, it did not traverse the full maze, and rather only stayed in the same section. So, I alterned my code to turn randomly between -90 to 90 degrees. This trial is shown below, and was successfull in traversing the full maze.
Below is my final code for the closed loop control.
I tried decreasing the distance it gets to a wall before turning but I had best success with the half a meter distance. The collisions only happen when the robot clips a wall, or when the robot turns a large amount in a tight space. The clipping is shown in the picture below.
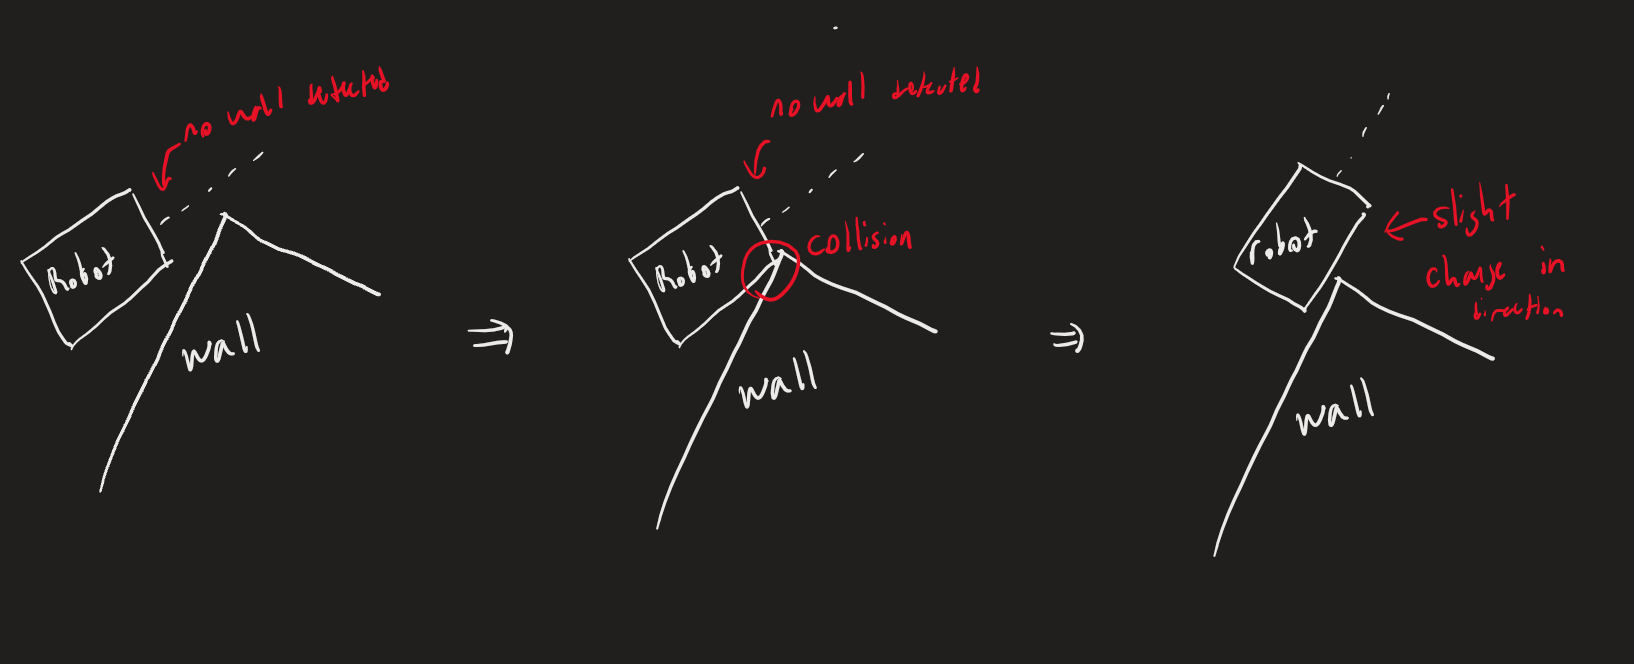
As you can see, the robot does not detect the wall in robot of it, becuase the ToF sensor sees only in a fine line, but the robot is thick and hits the wall still. To mimimize collisions completely, it is possible to rotate back and forth as it moves to get a widder vision, and change its direction to go to the farthest observed distance. This way you can eliminate the clipping problem.
Important Note
For some reason, I could never get the walls to show up in the plotter. I tried resetting and clicking the "Map," but had no luck.