Tiffany's ECE 3400 webpage
Welcome to my robot-building documentation for Intelligent Physical Systems!
Lab 1: Intro to Arduino, Servos, and Ultrasonic Sensors
Task List:
- Assemble robot
- Wire robot
- Program robot to move
- Implement ultrasonic sensing for wall detection
Part 1 - Assembling our robot
Components of our robot so far:
- Arduino Nano Every
- Servos powered by 4 AA batteries (1.5V)
- Ultrasonic Sensors powered by 9V battery
- Robot frame, composed of parts shown below:
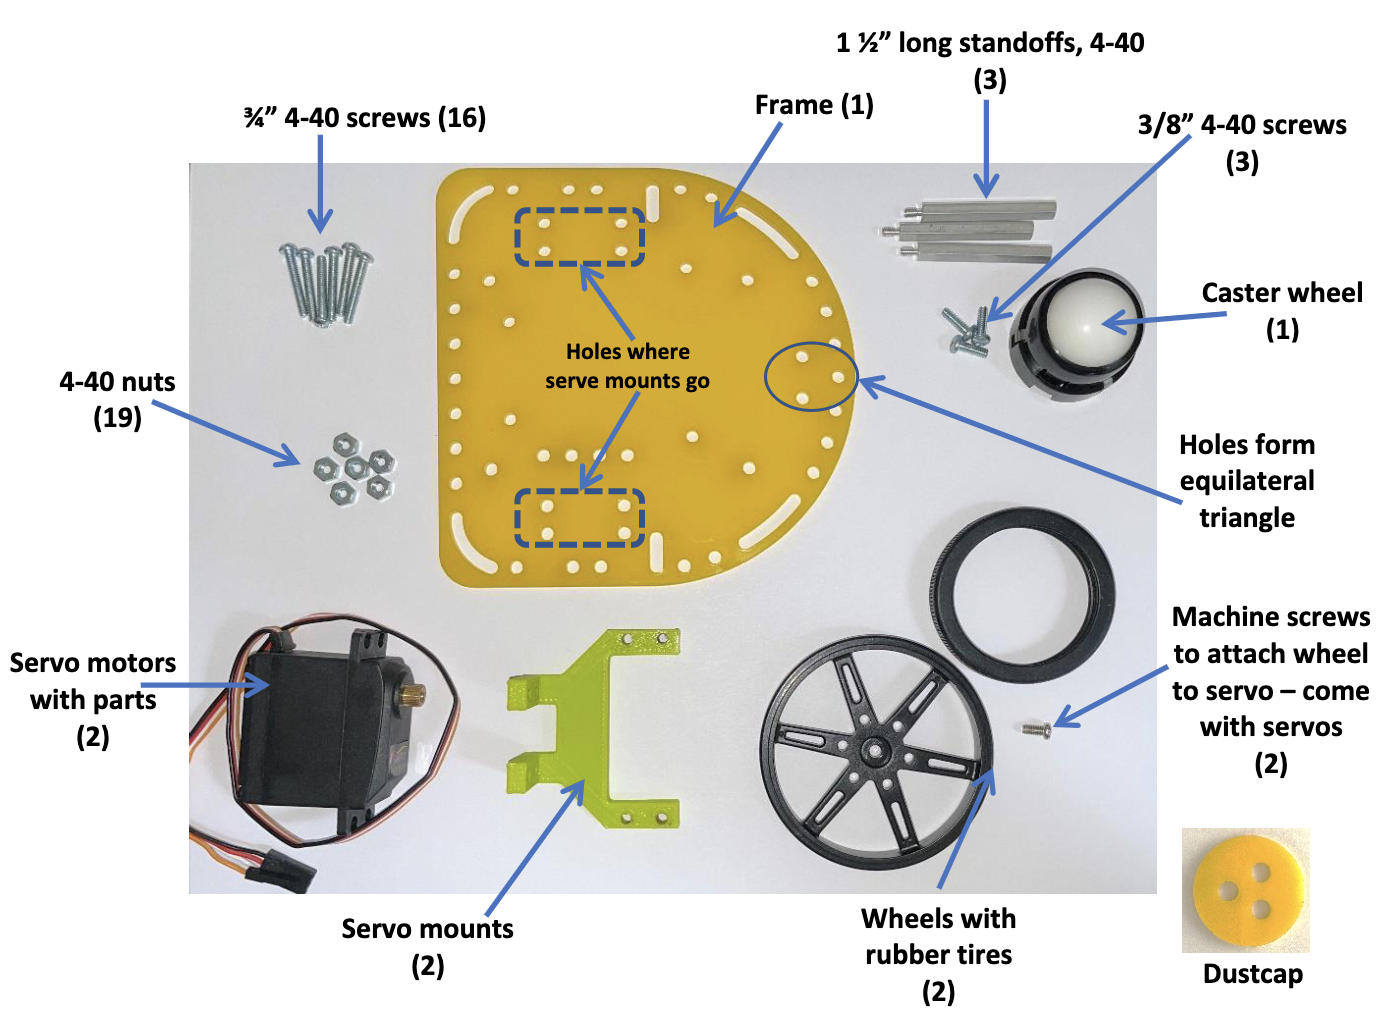
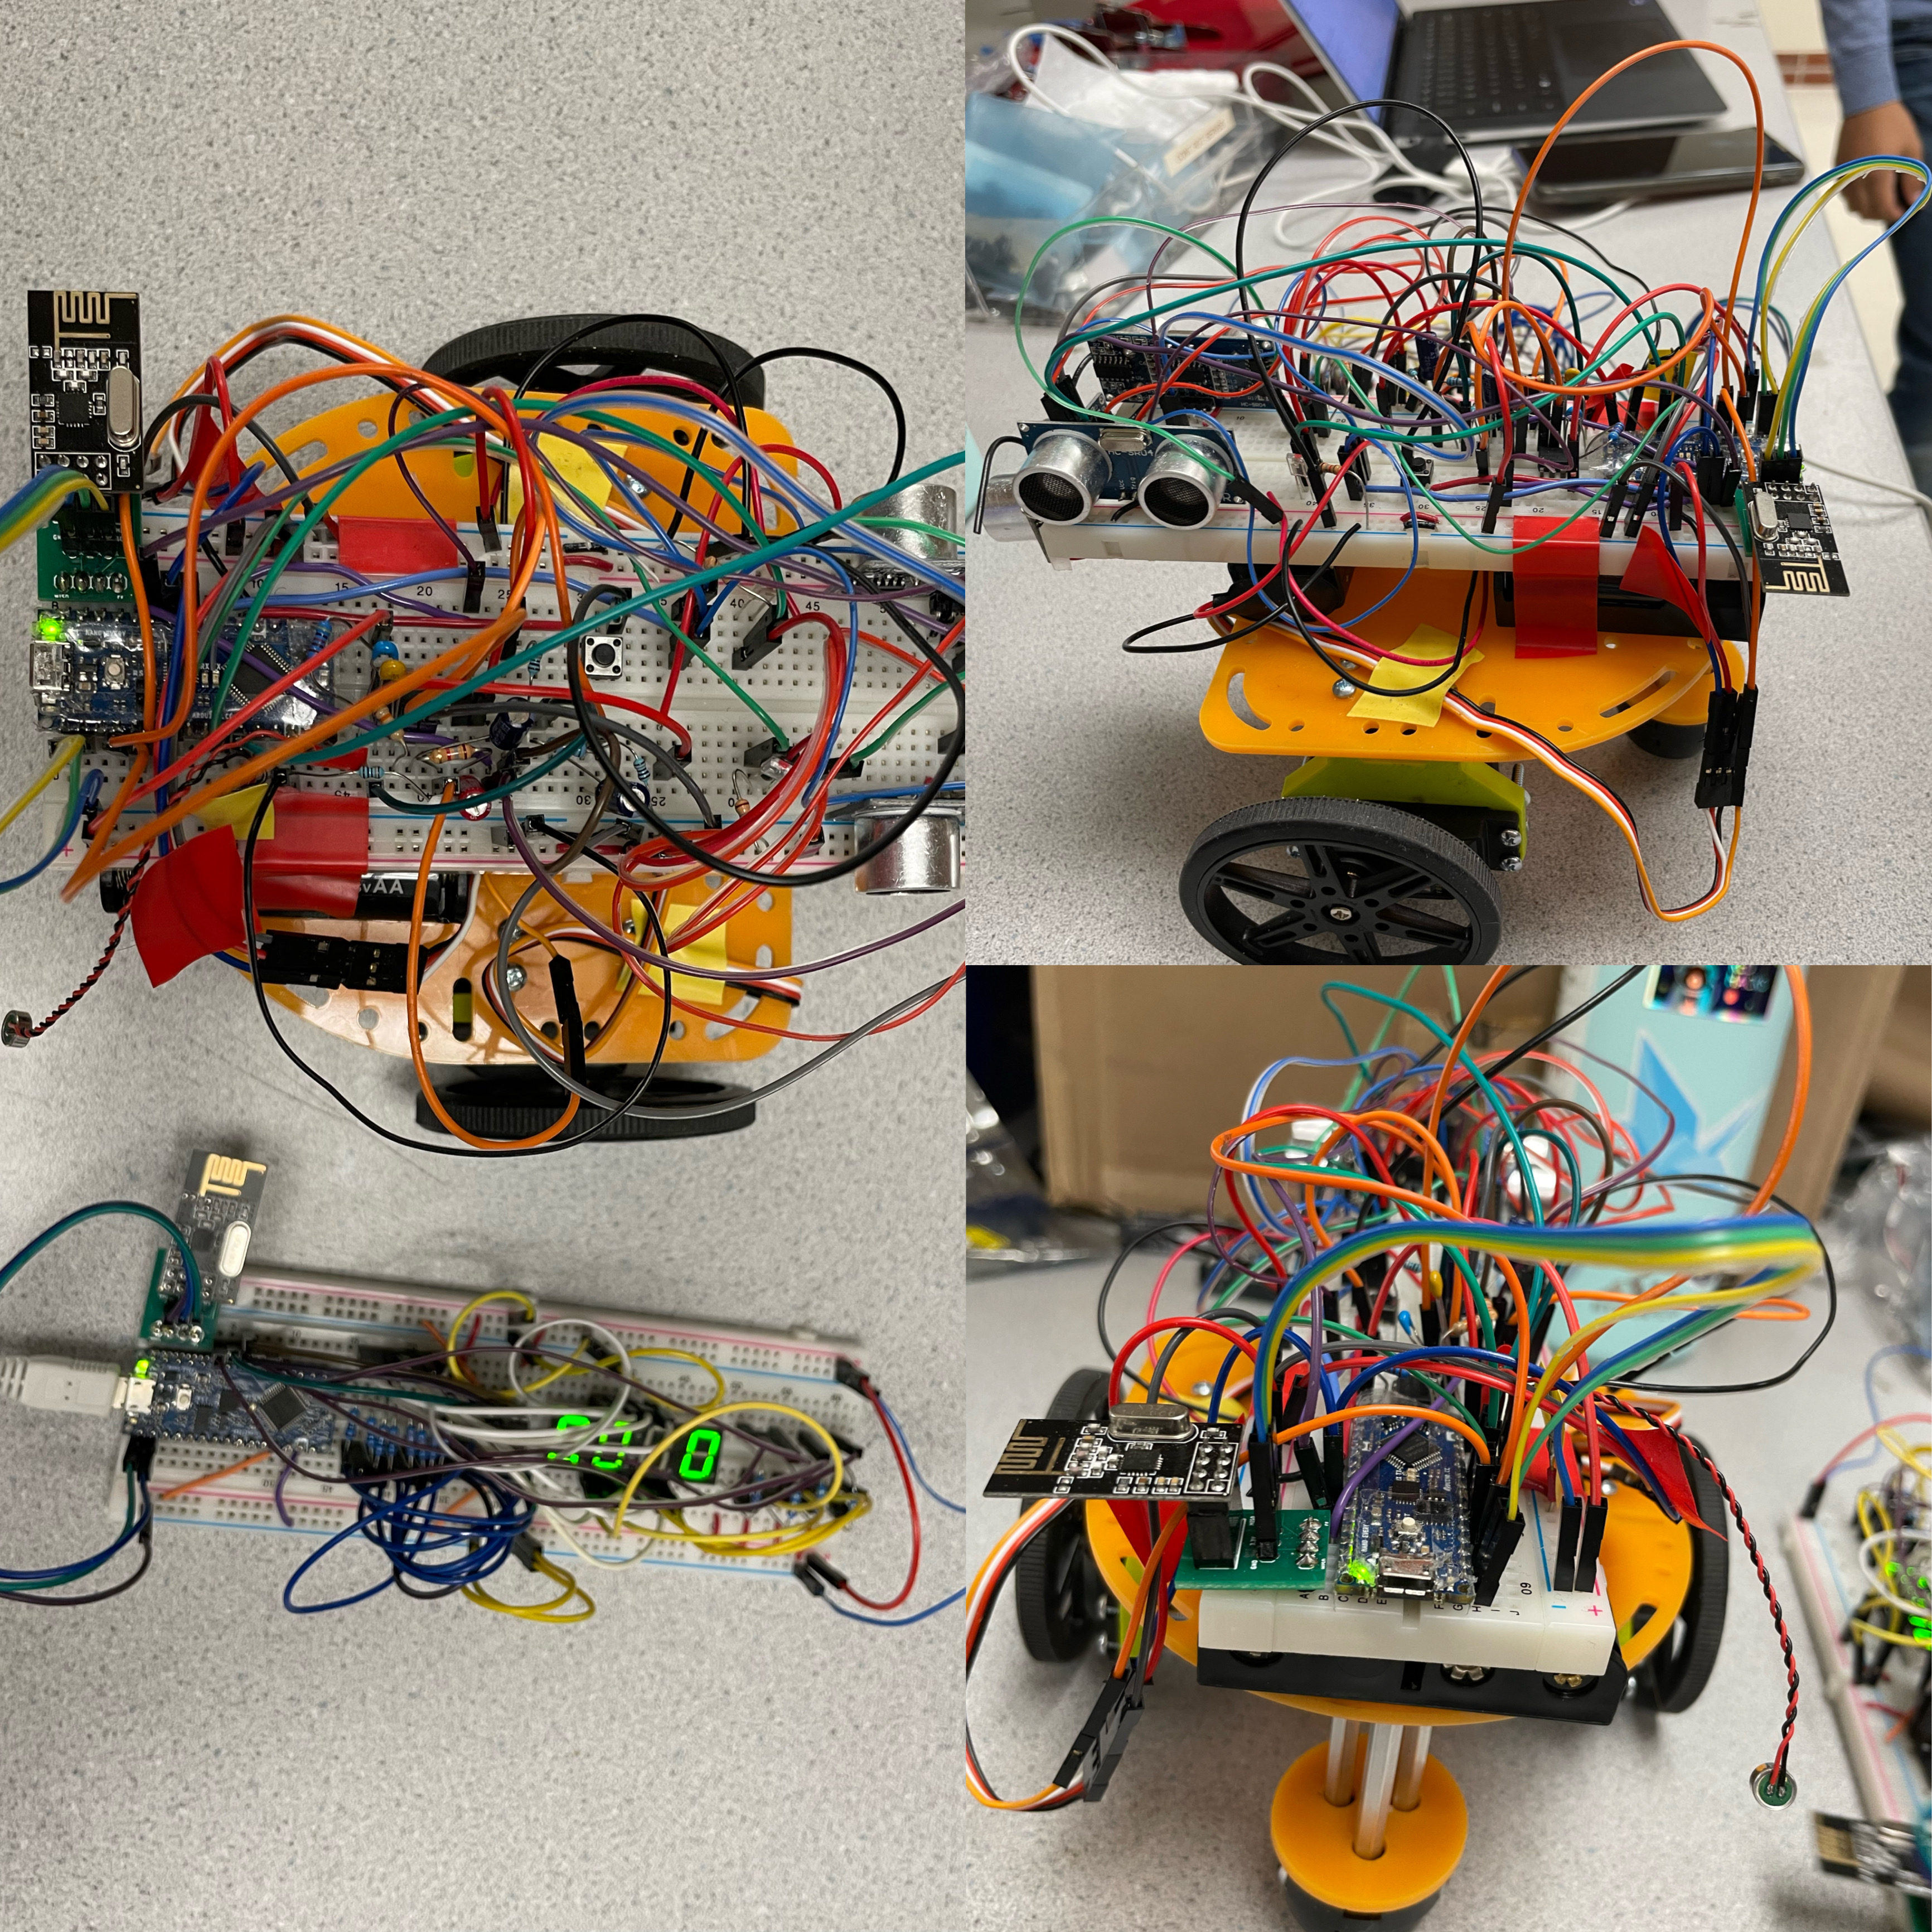
After assembling the our robot’s frame, we used velcro and tape to secure the breadboard and ultrasonic sensors. Here’s the final product:
Part 2 - Wiring our robot
Wiring of the Arduino with peripherals:
- Servos:
Left Servo PWM: Pin D5
Right Servo PWM: Pin D6
Left Servo Feedback: Pin A1
Right Servo Feedback: Pin A2 - Ultrasonic Sensors:
Trigger: Pin D3
Left US Echo: D4
Middle US Echo: D7
Right US Echo: D8
 After we finished wiring the servos with the Arduino, at first they were only making erratic movements. After debugging with the help of TAs, we realized that we had not connected the servos and Arduino to a common ground :(
Part 3 - Programming our robot to move
- We instruct the servos to turn by writing a value between 0 and 180 to the PWM input.
- 0 and 180 are the maximum speed in either direction (clockwise anad counterwise), and 90 indicates that the servo is not turning.
- Since the servos were mounted facing opposite directions, we should write 0 to the right servo and 180 to the left servo so that the robot moves forward.
- Writing 0 or 180 to both servos causes the robot to spin in place.
- We created functions to move the robot a certain distance (using delay()) by measuring the time it takes to travel a certain distance at a given speed.
- We also created functions to turn the robot a certain number of degrees using the same method.
Using these functions, we tested our robot to run the following sequence:
- Start in place facing north, motionless.
- After 5 seconds, move north approximately 20 cm, then stop, still facing north.
- After a 1 second pause, pivot in place towards the east by 90 degrees, then stop, facing east.
- After a 1 second pause, pivot in place to the left by 270 degrees, then stops, facing south.
- After a 1 second pause, move forward south over approximately 20 cm, then stop, facing south.
- After a 1 second pause, pivot in place to the right by 180 degrees, then stop, facing north.
Sadly, there is no video of this sequence, but we do a similar test in part 4 :)
Part 4 - Implementing ultrasonic sensing
Using ultrasonic sensors, our robot can semi-autonomously navigate a maze. When it senses that a wall is a certain distance ahead, it will stop moving and turn to the left or right, depending on our code. We programmed our robot to perform the following sequence:
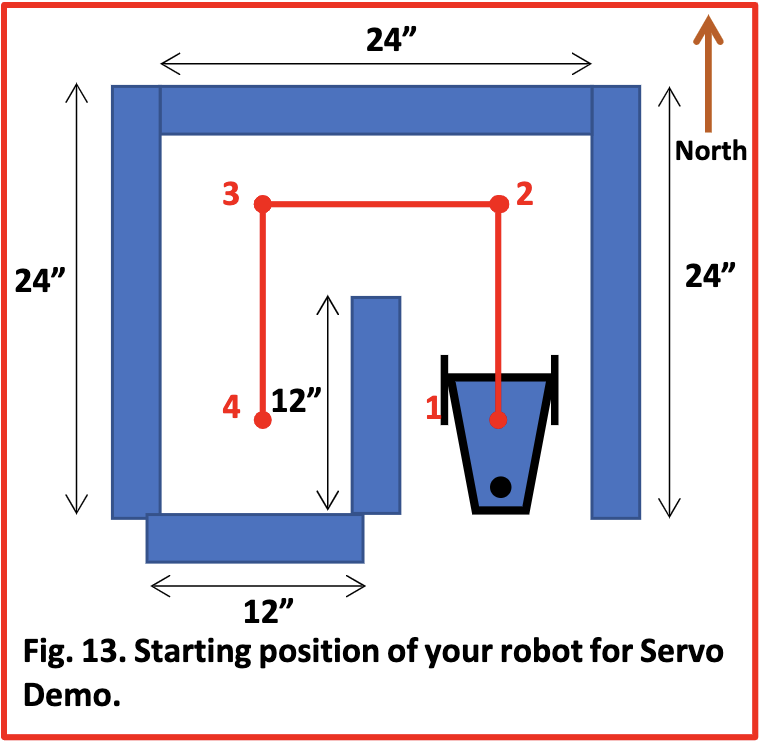
- Start in position 1, immobile.
- Once the RESET button is pressed, remain motionless for 1 second, then head North towards position 2.
- Once at position 2, turn smoothly in place to the left to face West, then navigate towards position 3.
- Once at position 3, turn smoothly in place to the left to face South, then navigate towards position 4.
- Once at position 4, turn smoothly in place to the right to face North, then navigate towards position 3.
- Once at position 3, turn smoothly in place to the right to face East, then navigate towards position 2.
- Once at position 2, turn smoothly in place to the right to face South, then navigate towards position 1.
- Once at position 1, turn smoothly in place to the left 540 degrees (1 ½ turns), ending facing North and remaining stationary.
Here is the same sequence with the serial monitor visible. The ultrasonic sensor readings are printed at each step of the sequence.
Thanks for watching! Come back next week for more~
