Lab 2 Bluetooth
The purpose of this lab was to establish a Bluetooth connection between the computer and the Artemis board.
Setup and Configuration
I followed instructions provided in the lab handout to set up my computer to run python kernels on jupyter lab. Then I created a virtual environment for this lab and dowloaded the codebase. I burned the provided ble_arduino.ino sketch into the Artemis Board and its MAC address was displayed serial monitor.

I updated the artemis_address in the >connection.yaml file with this MAC address and ensured that the Service UUID and GATT characteristic UUIDs match the ones in the Arduino sketch. I left padded the single digit 7 in the MAC id with 0.

I followed the instructions in the demo.ipynb jupyter notebook for configuring BLE. This notebook was helpful as it gave an overview of functions we should use to handle BLE operations. Initially, I was using macOS Version 11.2 and I was unable to connect to the Artemis Board using ble.connect() despite three attempts. After trying to debug this for a bit, I chose to update to macOS 12.2 and there were no issues with the lab at all. I followed through with the demo examples in the notebook to communicate with the board.

Lab Tasks
Task 1
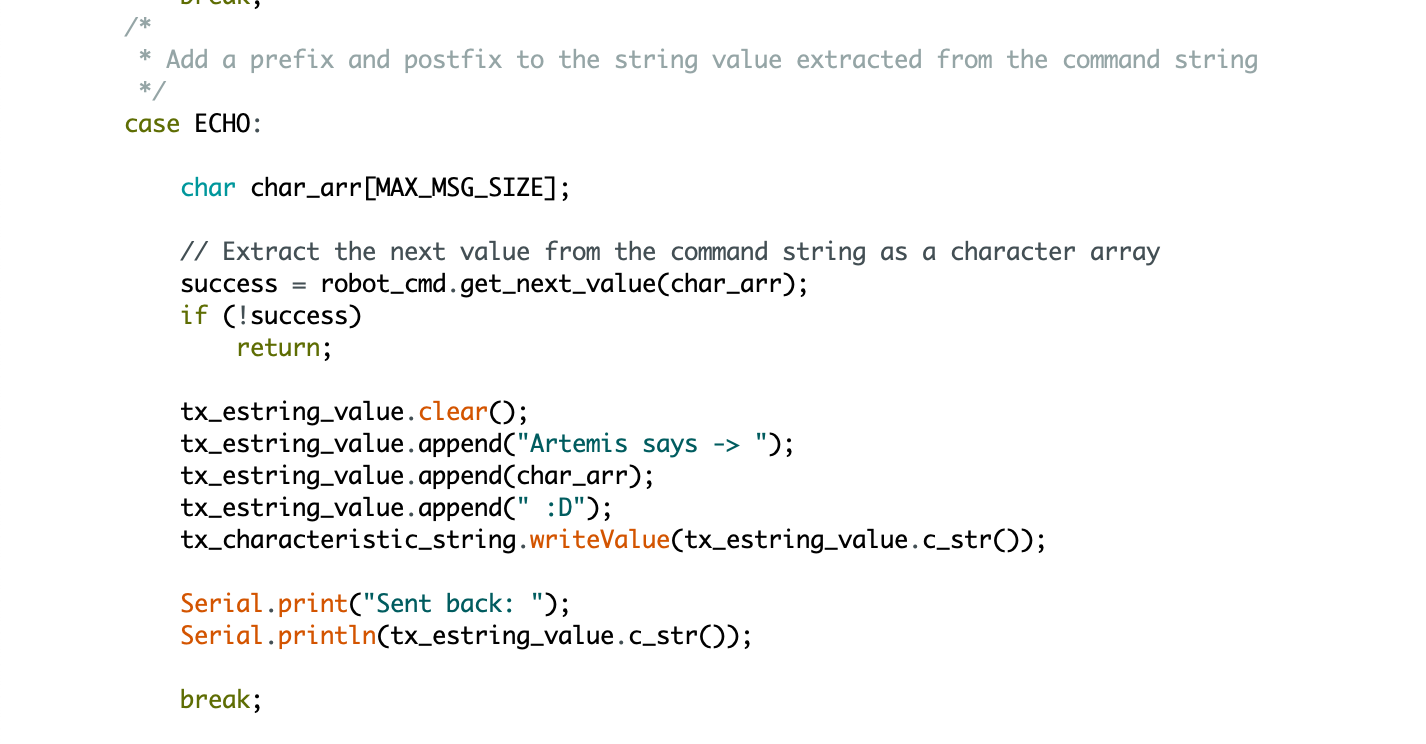
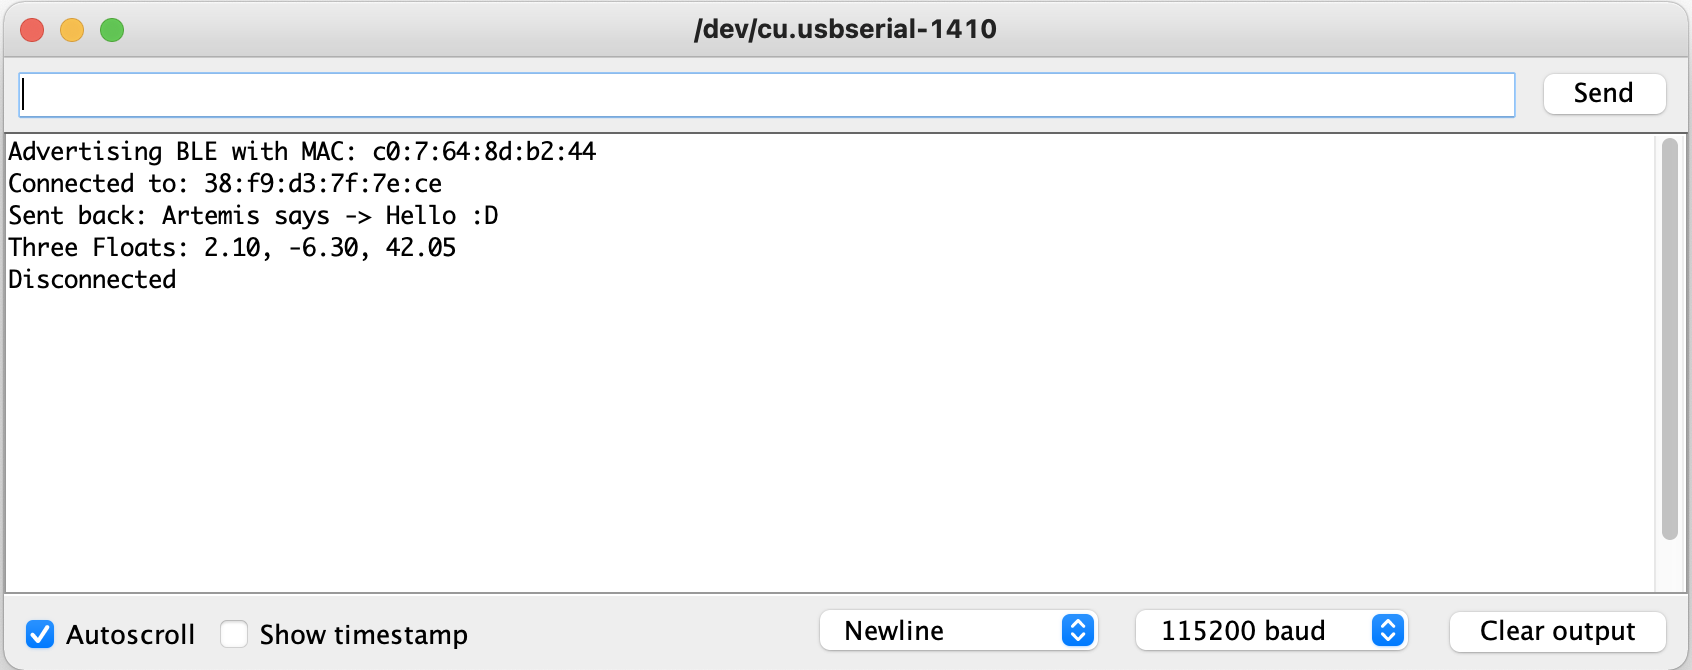
We had to write the ECHO command to receive a string and return an augmented string. I augmented the string as Artemis says -> [String Received] :D. To return the string, I used the logic from the PING command. In python, I used the CMD.ECHO to send the command with Hello string value and read the RX_STRING characteristic to receive the augmented string.


Task 2
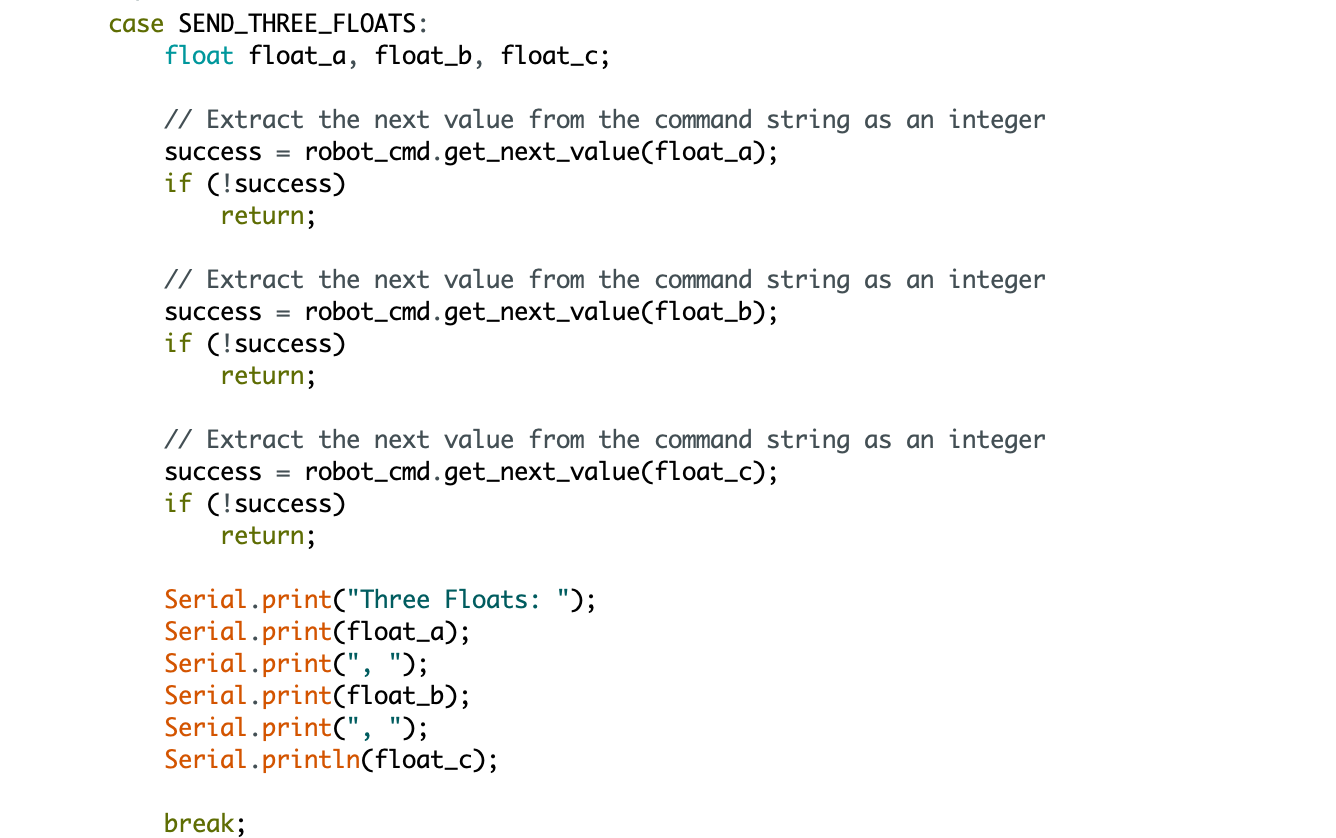
We need to send three floats to board, extract and display the values. I used the SEND_TWO_INTS command as the guide to complete the SEND_THREE_FLOATS command.


Task 3
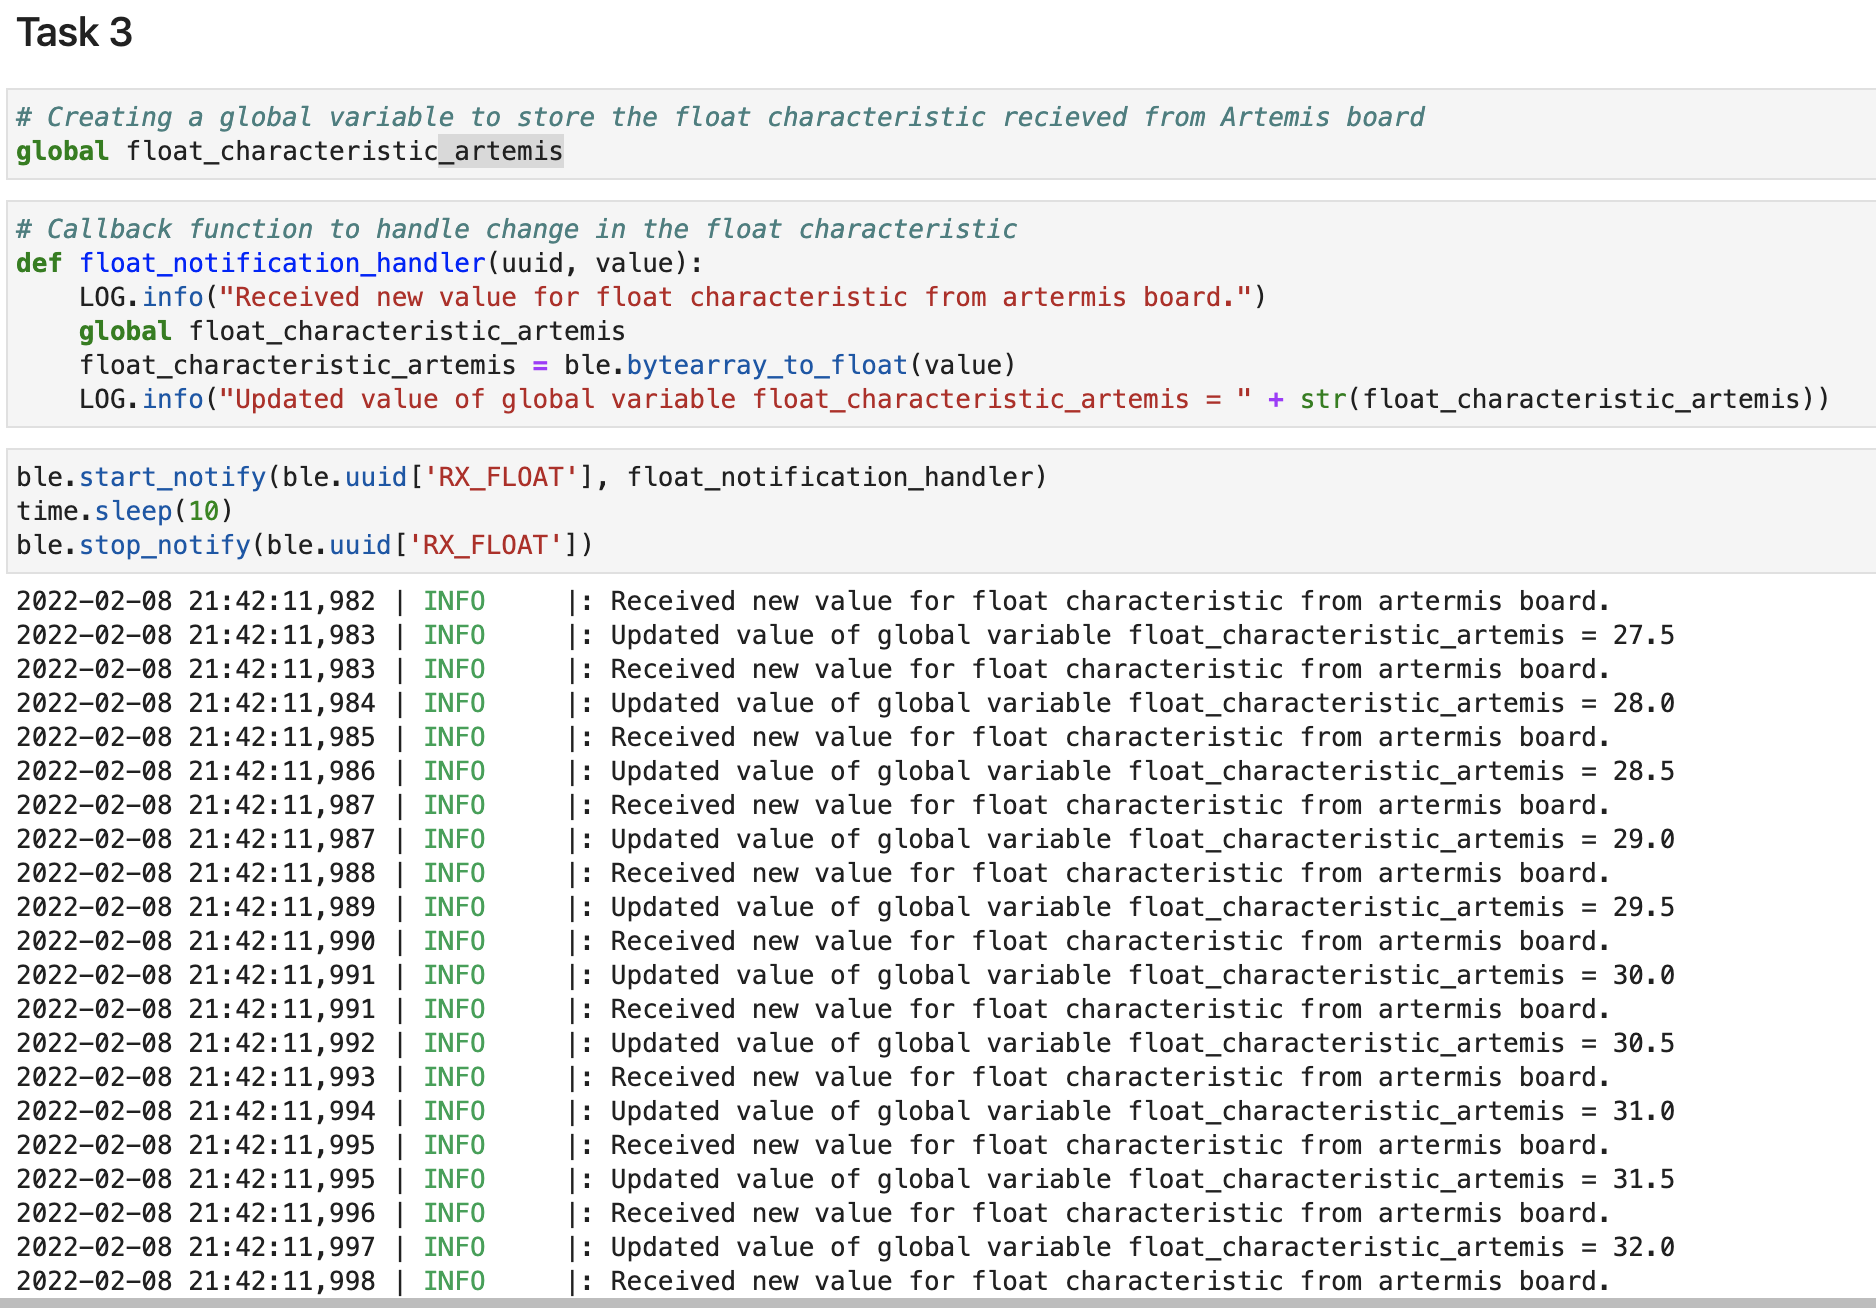
I set up the notification handler in Python to receive the BLEFloatCharacteristic float GATT characteristic from the board and store it in a global variable. I used ble.start_notify and ble.stop_notify with the float_notification_handler as the callback function for this. The callback function uses ble.bytearray_to_float, also used by receive_float.

Task 4
In approach 1, we receive a float value using recieve_float() and in approach 2 we receive it using recieve_string() and convert it to float. While both approaches perform the same task, there is a difference in efficiency. In approach 2, the value is defined as BLECStringCharacteristic and stored as a char array. Each character uses 1 byte (ASCII encoding), while a float value in Arduino uses 4 bytes. A float can range from 3.4E+38 to -3.4E+38 while in the same data size only four characters can be sent. A float value can also have a higher resolution (more number of decimal places) compared to the string value of the same size. In my opinion, Approach 2 is only better if we want to send a value which (1) has three digits or less (fourth one is the decimal point) or (2) Is out of the range or requires a higher resolution than supported by floats in Arduino. In approach 2, there is an overhead cost of parsing (btw string and float) on both ends. But there is a possibility of sending more than a single float value in one go, separated by delimiters as well. Thus it depends on the needs of the specific value being transmitted to decide between the two approaches.