Lab 4
Characterize Your Car
The purpose of this lab was to familiarized with the capabilities of the Cyclone double sided flipping RC car and learn to control it manually.

Prelab
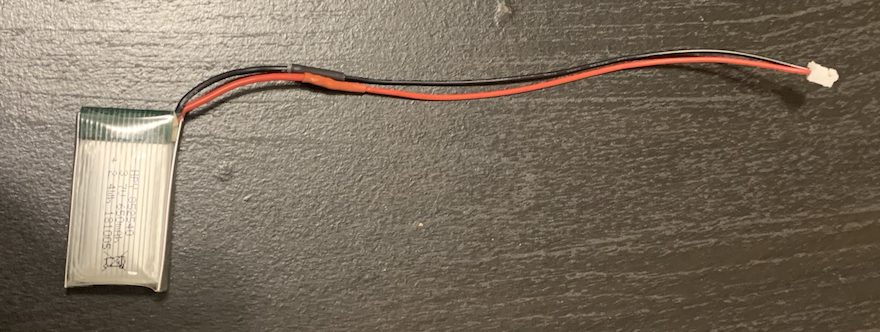
We plan to use the 600mAh battery which comes with the car to power up the Artemis and use 850mAh batteries from the lab to power the motors. To allow the Artemis to connect to the battery, I had to replace the black connector with the white 2mm JST connector. To avoid shorting the battery, I first cut the power cable and spliced it with the corresponding cable on the connector. Only after securing the soldered joint with heat shrink, I spliced the ground cable. As the polarity of the cables (by color) was opposite, I switched them before connecting the battery cables.

Category A
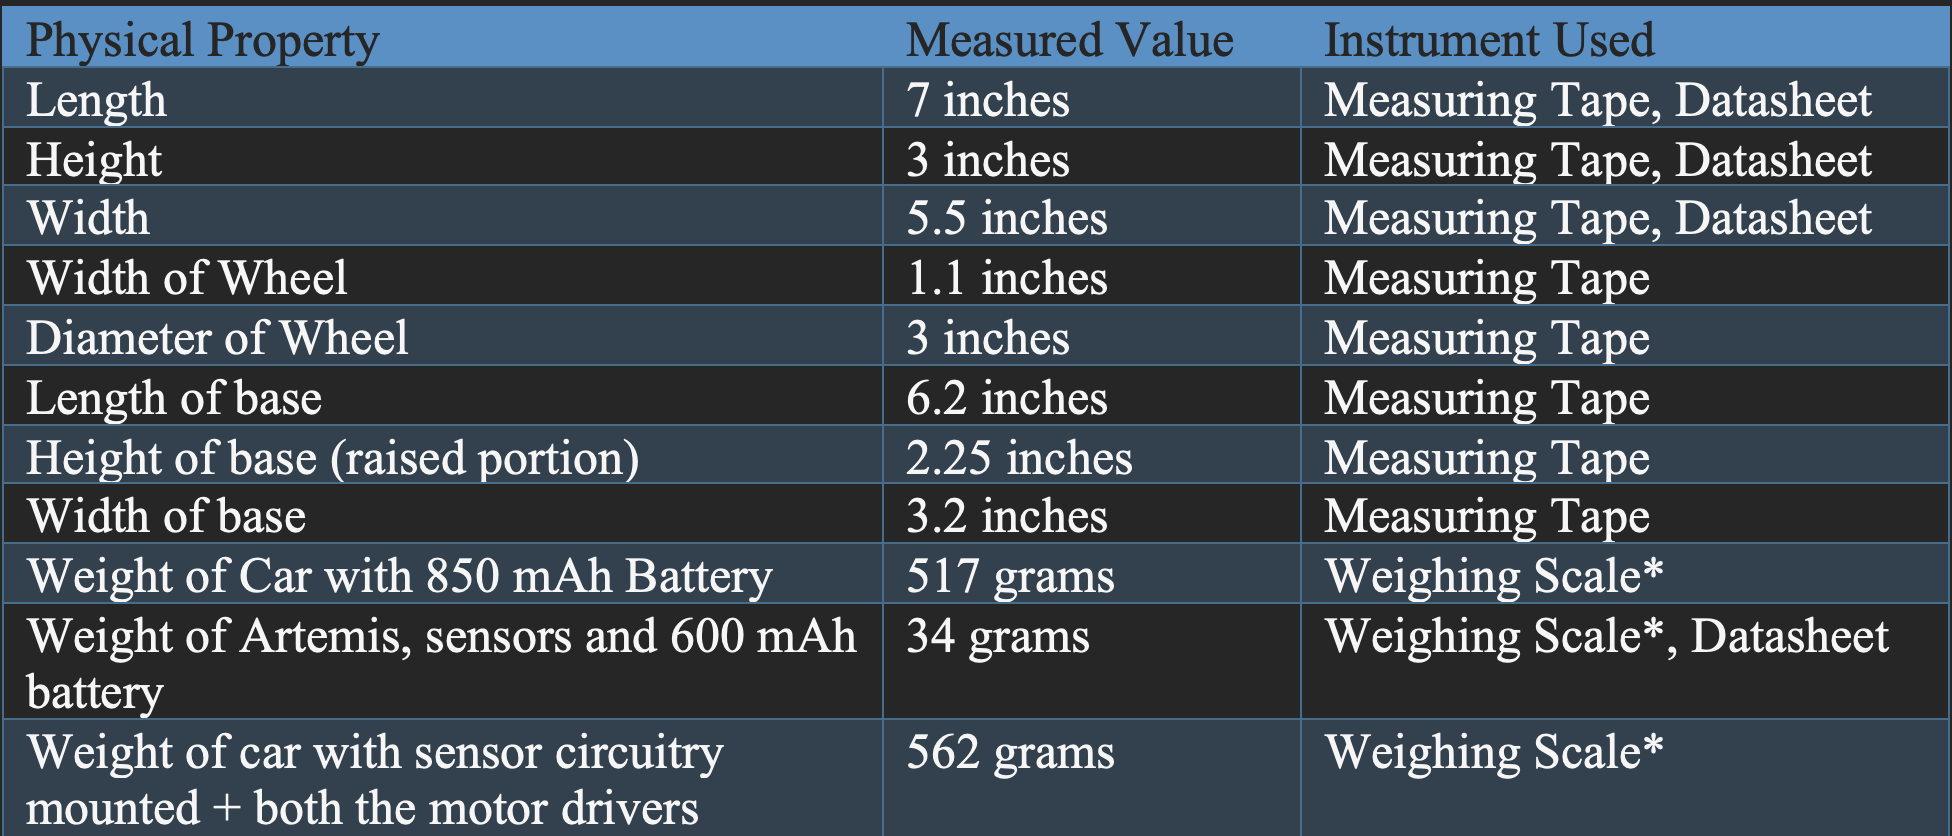
Dimensions and Weight
For this section, I measured and recorded the physical properties of the car.

Batteries
The Li-Ion battery took about 1 hours 15 mins to fully charge. To check that the battery was charged, I used to the multimeter to ensure that the battery’s terminal voltage was 3.7V or above. Note that the charging time mentioned above is for a discharged battery (the car can barely move, V terminal voltage). To calculate the battery life, I used a completely charged battery and discharged by driving the car in different ways.

Knowing the battery life and the charging time was helpful, as I could plan out my testing accordingly.
Category B
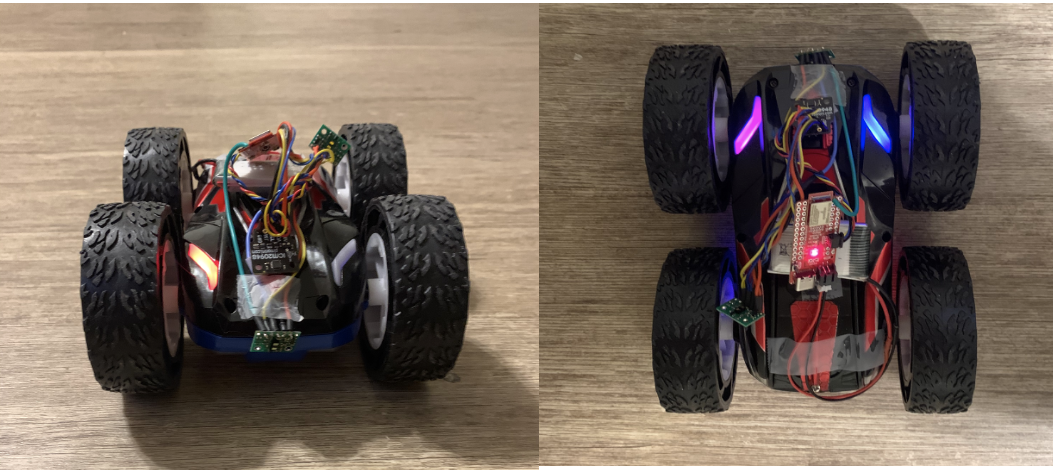
As recommended, I mounted the Artemis wired to the sensors and the battery to the car using tape. I placed one TOF sensor on the front of the car and the IMU flat on top. The mounting was not very secure and given my poor control of the car, I did not use the setup to avoid damaging the circuitry.

What surfaces can it handle?
I tested the robot on different surfaces – wooden flooring, carpet, and tiles. It could handle all the surfaces. The wood was best for performing swift turns. On carpet, it was easier to stop and control the robot as it had more traction.
How reliably does the robot turn around its own axis?
The robot can be turned on its axis but holding down either the right or left button. On a newly charged battery, the robot makes about 5 rotations per second. Adjusting the sampling rate of the TOF sensor, we can use this behavior to detect obstacles around robot.
What is the Stopping Distance?
This is the distance the car travels after the control button has been released. I drove the car in straight line my corridor and let of the control at the start tape measure; I took repeated trials for different speeds. As expected, the stopping distance is higher for higher speeds. The stopping distance for a car moving at full speed is 142 inches. This can be used to decide when to stop driving the motors so that robot ends up at the desired position.
How well can you operate the car with manual control?
The remote-control buttons are extremely sensitive, making it difficult to operate the car with manual control, but it gets easier as the battery discharges. Mastering manual control of the car allow us to be able to replicate it in the autonomous robot.
Tricks
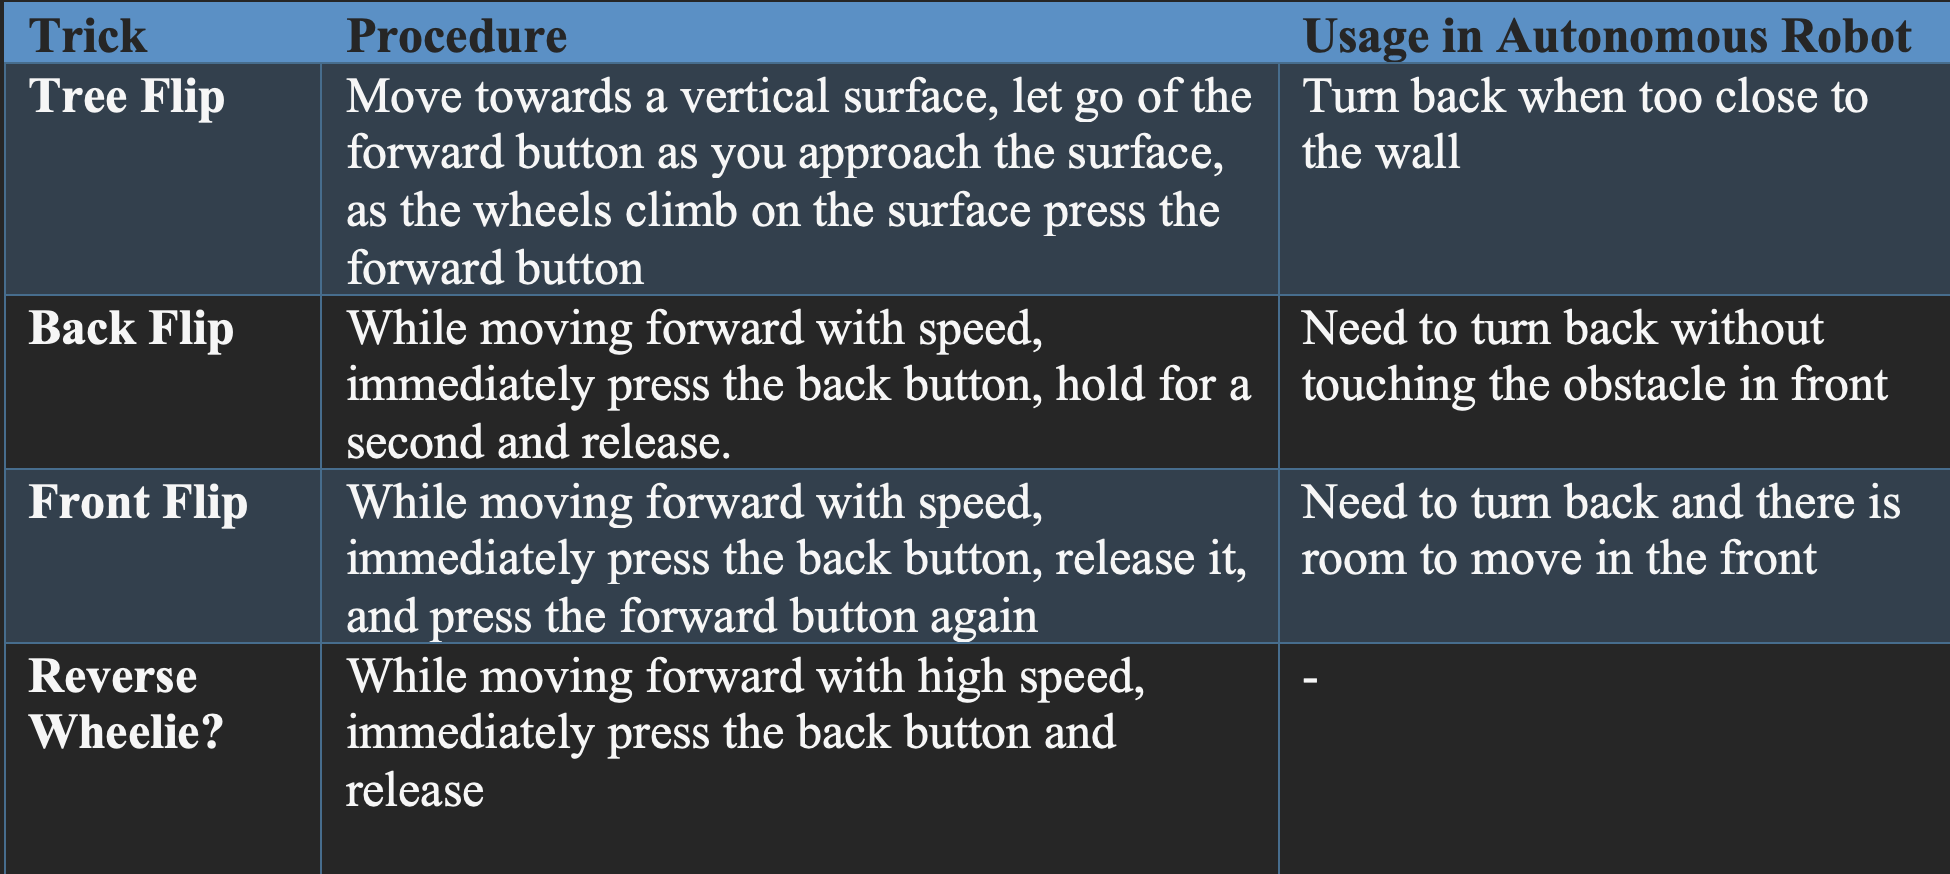
I was not able to successfully reproduce every stunt in the tutorial. Here are some stunts that I reliably perform.

If these flips can be replicated with the procedures, then they can be used in the autonomous robot to turn the robot backwards (sensor is in the front) without having to make a U-turn.
Raised Surfaces
I tried to get the robot to climb over a 2-inch-high barrier (carrom board). While trying to climb, if the robot is moving fast, it flips, and lands having rotated 90 degrees. To successfully climb the barrier, we need to move the robot forward with a slow speed and press right/left button while climbing.
Please note that all category B experimental measurements change a lot based on the battery charge. This means that we might have to account for battery voltage while using these measures in the autonomous robot.